I need a blog, and I need it now!
When I decided to get my blog back up and running, I knew I wanted to run it in a way that I hadn’t run a blog before. This meant something other than WordPress on a stock LAMP (Linux, Apache, MySQL, PHP) stack style set up. I had heard many good things about Hugo, so I figured I’d give it a try. I’ve got to say, I’ve been pleasantly surprised so far.
I set this blog up using Microsoft Azure App Service coupled with Visual Studio Team Services (VSTS) for a fairly seamless hosting and blog editing experience. Let me show you how I did it. =]
What are my goals?
Now, before anyone yells at me for writing a tutorial on how to set up something as lightweight as a statically generated blog on a Web App in Azure App Services using VSTS, let me outline my goals for this tutorial:
1. Running Hugo
2. Using **free** Azure services
3. Using git for version control
4. Automated deployment via version control
5. Graphical user interface experience for Azure and VSTS for new users
6. Zero cost for hosting or domain name (shared domain name is fine)
This tutorial will cover everything you need to know to accomplish the above goals. Once you’re done here, you can also expand on this solution by changing the way your web app is set up to include custom domain names, SSL, CDN, etc. This tutorial is simply the introduction on how to accomplish something like this and will give you experience and knowledge around using these services and tools in a cohesive way.
Before we get started…
There are a few things you’re going to need to have set up prior to going through this tutorial. You will need:
A Microsoft Azure account.
- You can set up a free trial account here if you haven’t already had one.
A Visual Studio Team Services account.
- You can get started for free here.
Hugo installed on the machine you’ll be working from.
- You can find an install guide for Hugo here.
Git installed and configured on the machine you’ll be working from.
- You can find a very handy Git cheat sheet here that has tons of great info including installation for git.
That should be all you need to get going with this tutorial, so let’s begin!
Tutorial start - Creating a local Hugo site
Step 1: Let’s make a new site locally!
As mentioned in the Before we get started section, make sure you have Hugo installed and ready to go. Do a quick check to ensure Hugo is installed and the binary is working with hugo version. The output should look something like this:

Now that we know Hugo is installed, let’s get the site created locally! I’m going to be creating this site in the ~/demo folder, but feel free to create this site wherever you deem necessary.
Create the folder structure by running
mkdir ~/demo.Create the new Hugo site by running
hugo new site ~/demo/hugo-test.- I’m naming my project for this tutorial
hugo-test. Feel free to use something else if you’d prefer!
- I’m naming my project for this tutorial
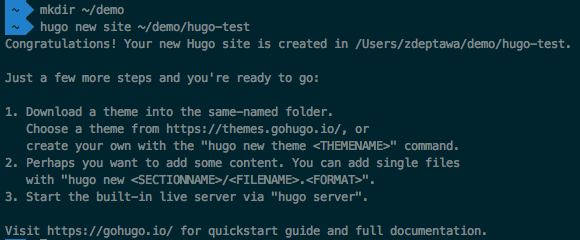
Now change directory to your new site, and make sure files exist there using cd ~/demo/hugo-test and ls.

If files exist, you’re good to go - Hugo created the new site for you locally! Now it’s time to do some configuration.
Step 2: Let’s set a theme for Hugo!
We now have our new hugo-test site, but we need to set up a few things before we get going. First, let’s configure a Hugo Theme. We’ll use the hugo-classic theme being that’s what I went with for the blog you’re currently reading.
Make sure you’re still in the new site’s folder. You can do this by running
pwd.Initialize the site’s folder for use with git by running
git init.
Pull down the
hugo-classictheme using git by runninggit submodule add git@github.com:goodroot/hugo-classic.git themes/hugo-classic.
Copy the contents of the
themes/hugo-classic/exampleSitedirectory to the root of the site by runningcp -Rpv themes/hugo-classic/exampleSite/* ..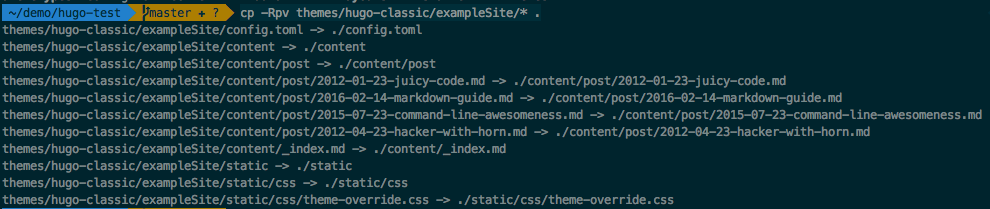
Awesome! You now have a new site created locally with some example site data!
Step 3: Let’s test the site locally!
Now that we have the site and we’ve loaded it with some example data that was provided with the theme, let’s test it out locally.
With Hugo, you can run an ultra-lightweight webserver to test your site quickly locally by running hugo server from the command line. Let’s do that now and see what we’ve built so far!
Make sure you’re still in the new site’s folder. You can do this by running
pwd.Start the Hugo server by running
hugo server.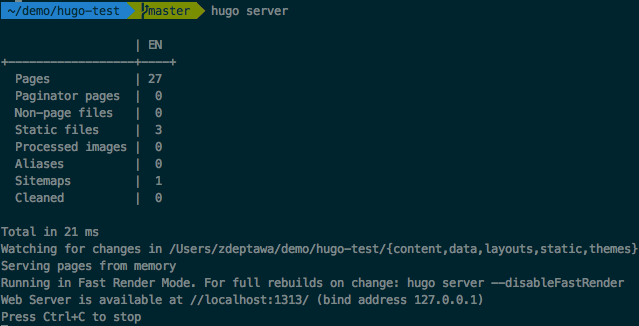
Copy the
localhostURL mentioned in the output.- The URL will most likely be
localhost:1313if no other Hugo servers are currently running.
- The URL will most likely be
Open up a browser and navigate to that URL -
localhost:1313in my case.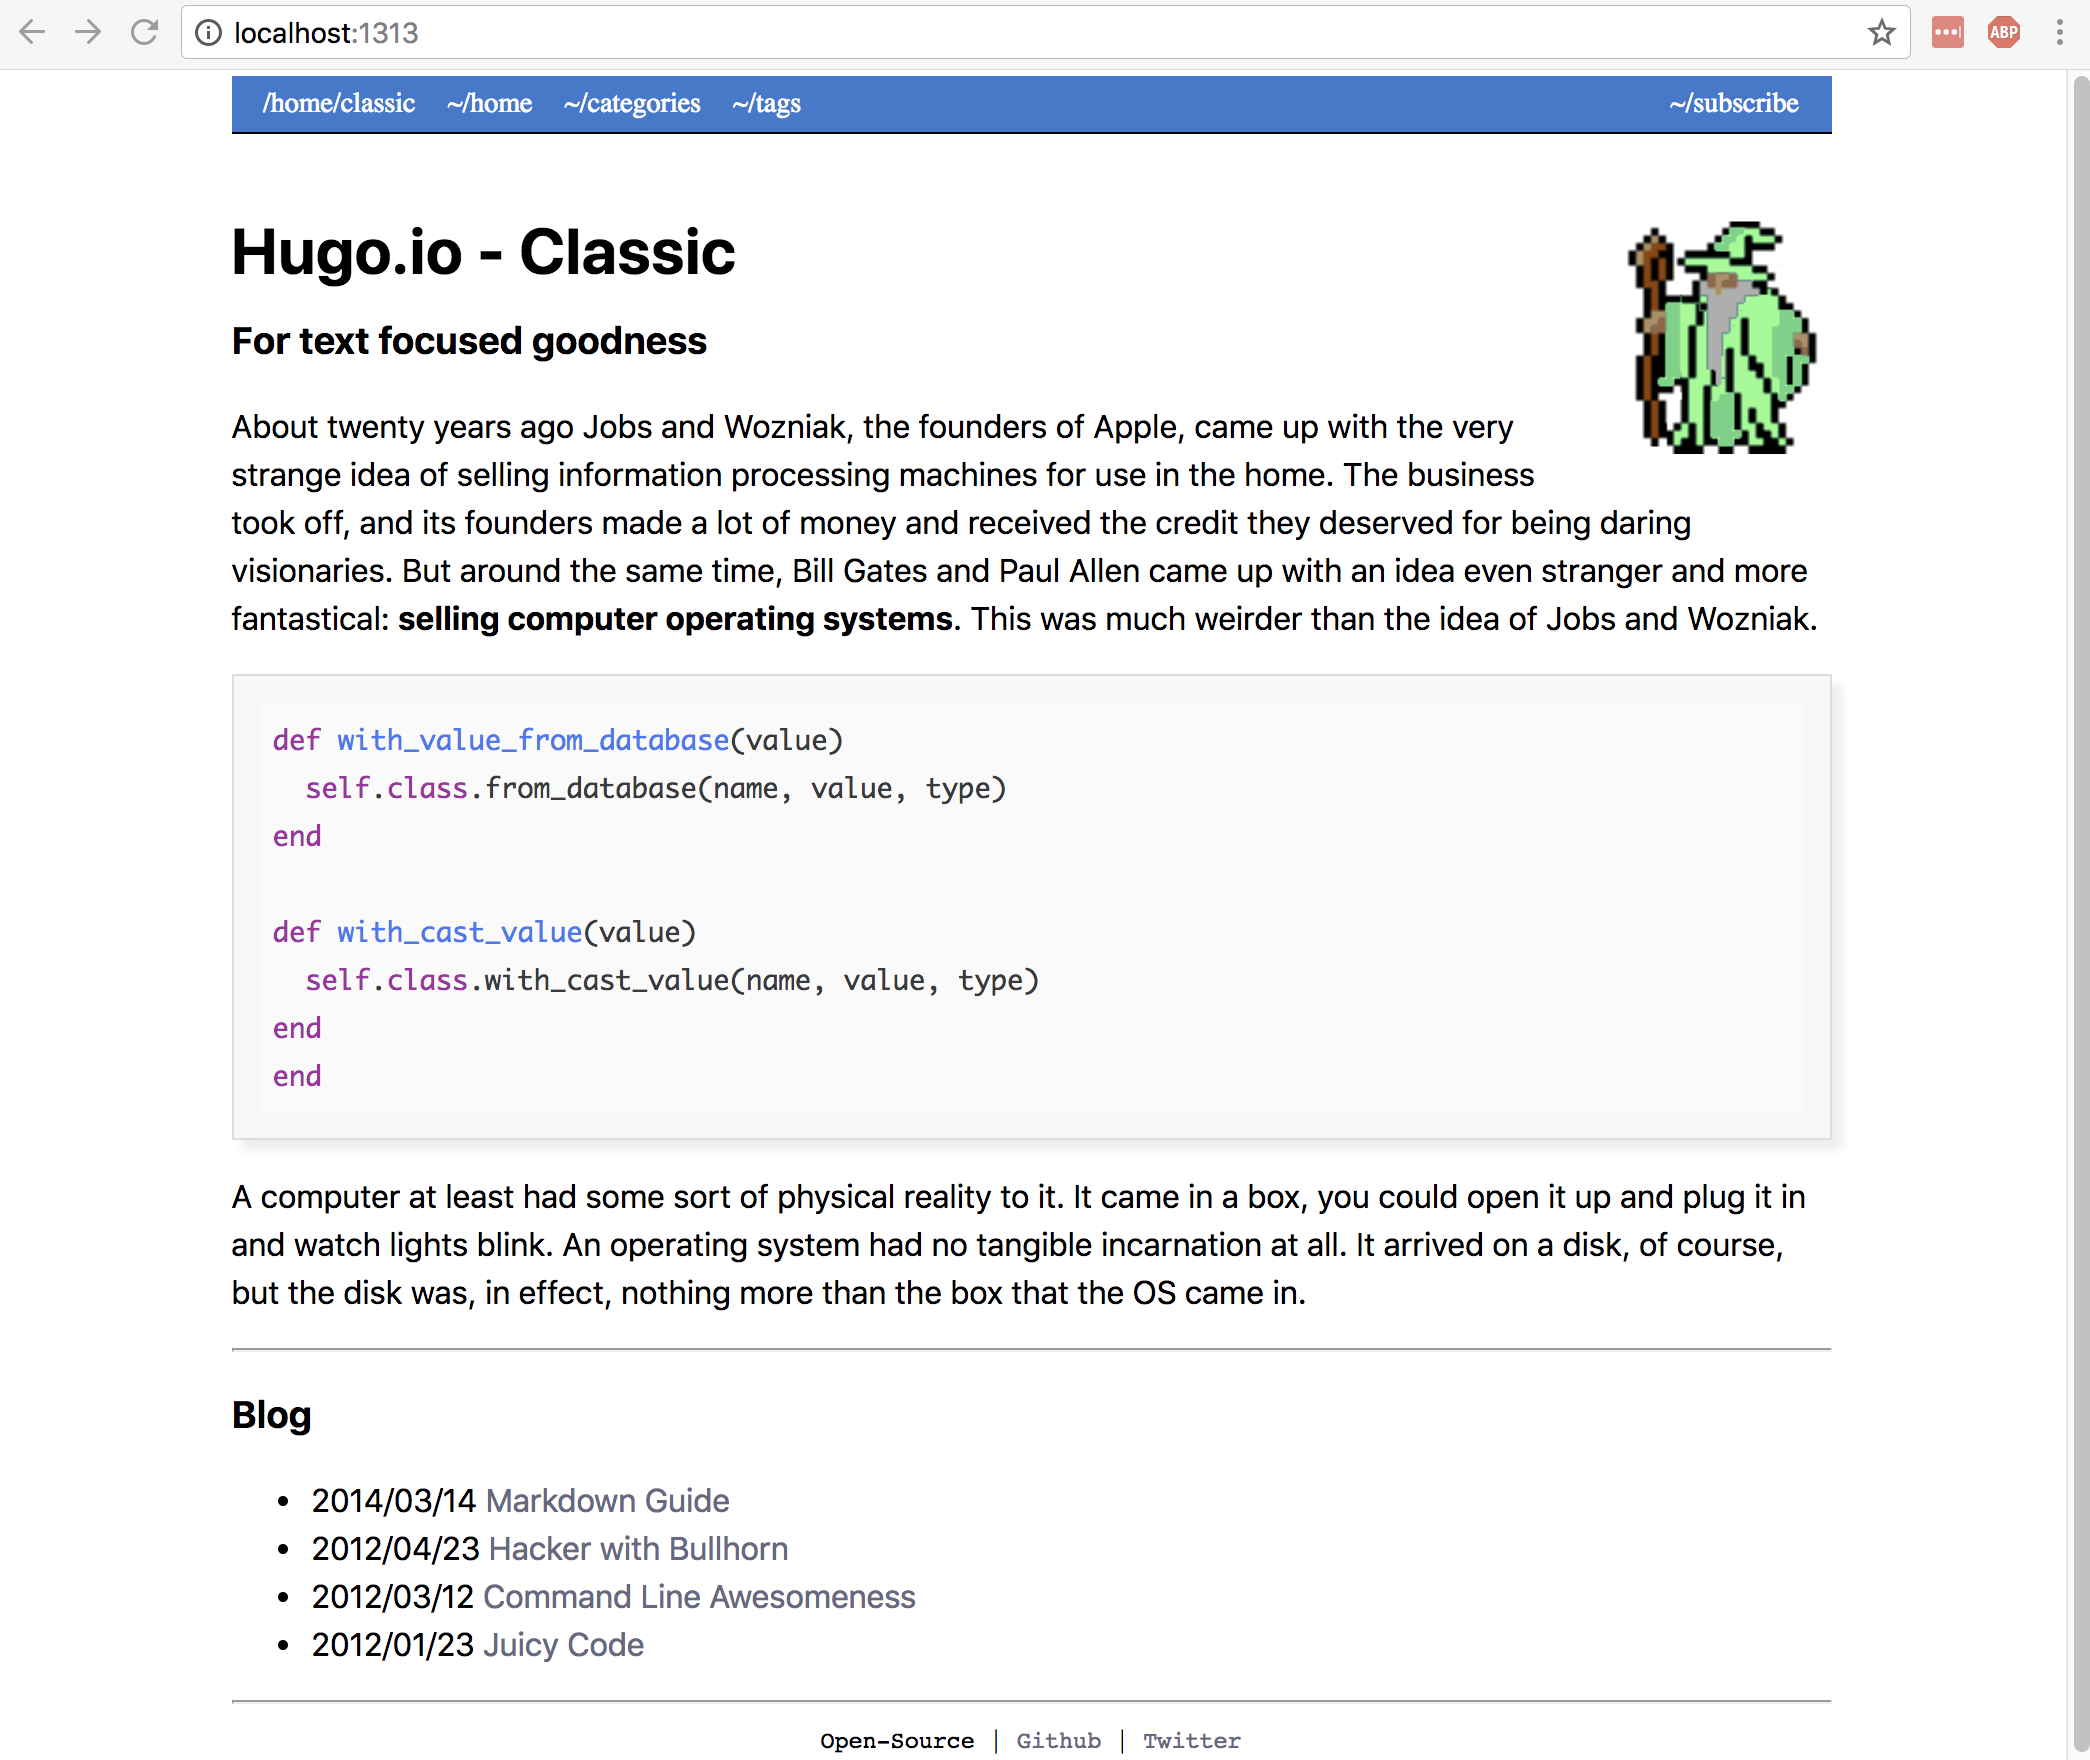
Have a look around your newly created Hugo site’s example content and structure!
Sweet! You did it! We’ve got a locally created Hugo site that is up and running on a local Hugo webserver. Pretty exciting, right? :D
Setting up Visual Studio Team Services
Step 4: Let’s set up a new project in Visual Studio Team Services!
Now that we have a site working locally, let’s set up the VSTS (Visual Studio Team Services) project for this new blog. If you’ve just created your VSTS account, you’ll be asked to create a new project and it will look something like this.
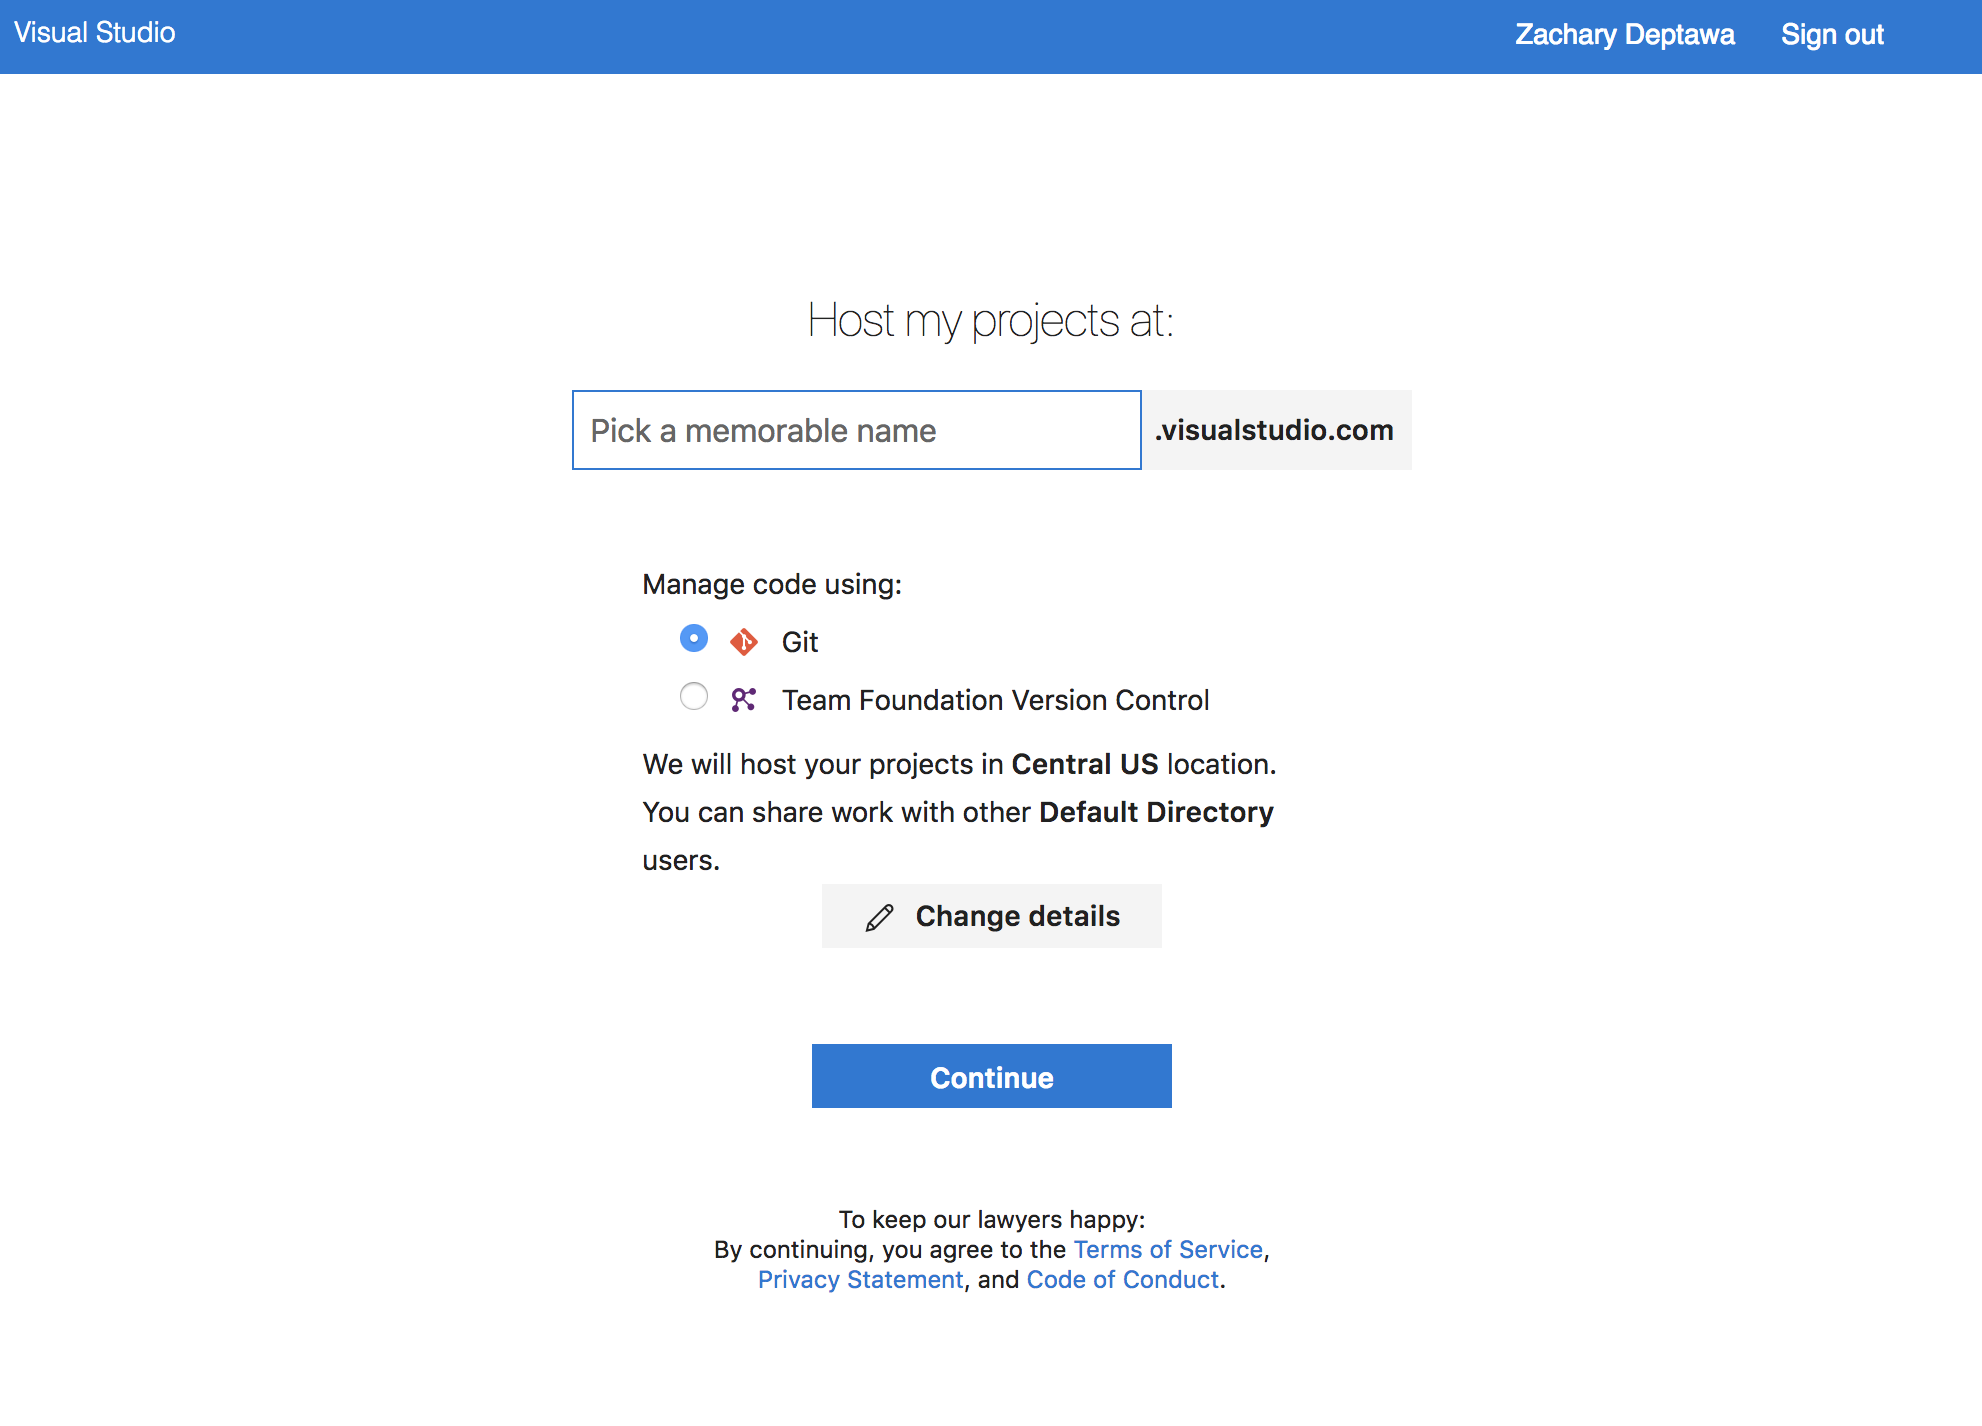
Perform the following:
Set the visualstudio.com subdomain where you’d like to host your projects. This is where your projects will be held within
visualstudio.com.- IMPORTANT - Being this subdomain will use the
visualstudio.comdomain, it is global and must be globally unique across the entire domain/all customers.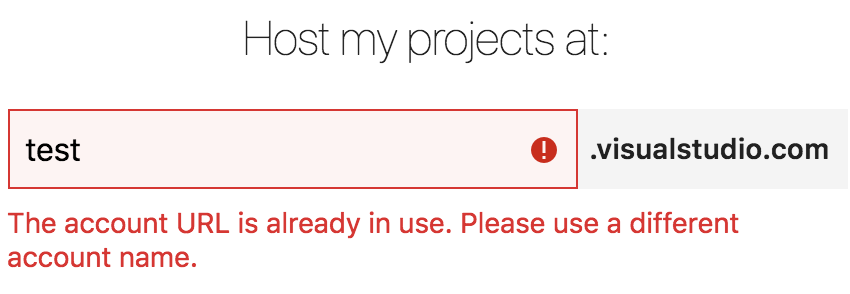
- IMPORTANT - Being this subdomain will use the
Make sure
Gitis selected for managing code.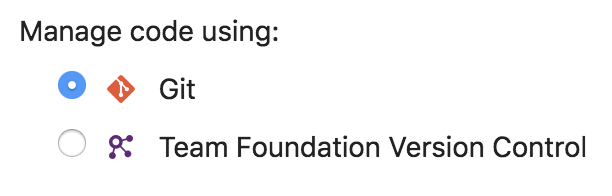
Click on
Change detailsto open up more configuration options.- Set your project name. For the purposes of this tutorial, I used
hugo-testas my project name. - Leave
Organize work usingdropdown set toAgile. - Leave
Host your projects indropdown set toCentral US.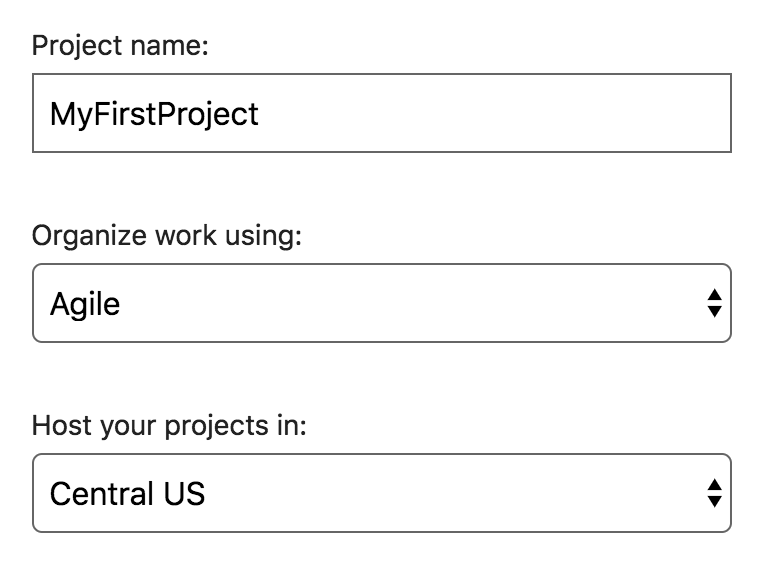
- Set your project name. For the purposes of this tutorial, I used
Click
ContinueWait for the new project to finish being created!

You should be redirected to your new project upon creation.
Step 5: Let’s push the code into Visual Studio Team Services!
Let’s take some inventory of what we’ve done so far. We’ve:
- Created a local Hugo site!
- Loaded it up with the
hugo-classictheme and some example data - Tested it with the local
hugo serverwebserver - Created a project on VSTS to store this code
Now that we’ve come this far, we need to get this code into VSTS for version control. If you’re not familiar with version control, it’s a system that stores the changes to a codebase’s files over time. What this does is it allows you to see all of the history of files since they’ve been under version control. You can see who made changes, revert changes, compare changes - or do other interesting things like tag releases, integrate with continuous integration and continuous deployment pipelines, work collaboratively with an entire team on the same codebase, etc. For some more information, check out this article that covers version control in more depth.
Being we just finished creating the VSTS project for this site, I’m assuming we’re still at the main page for that project. If not, head back over to the project’s main page. It should look something like this:
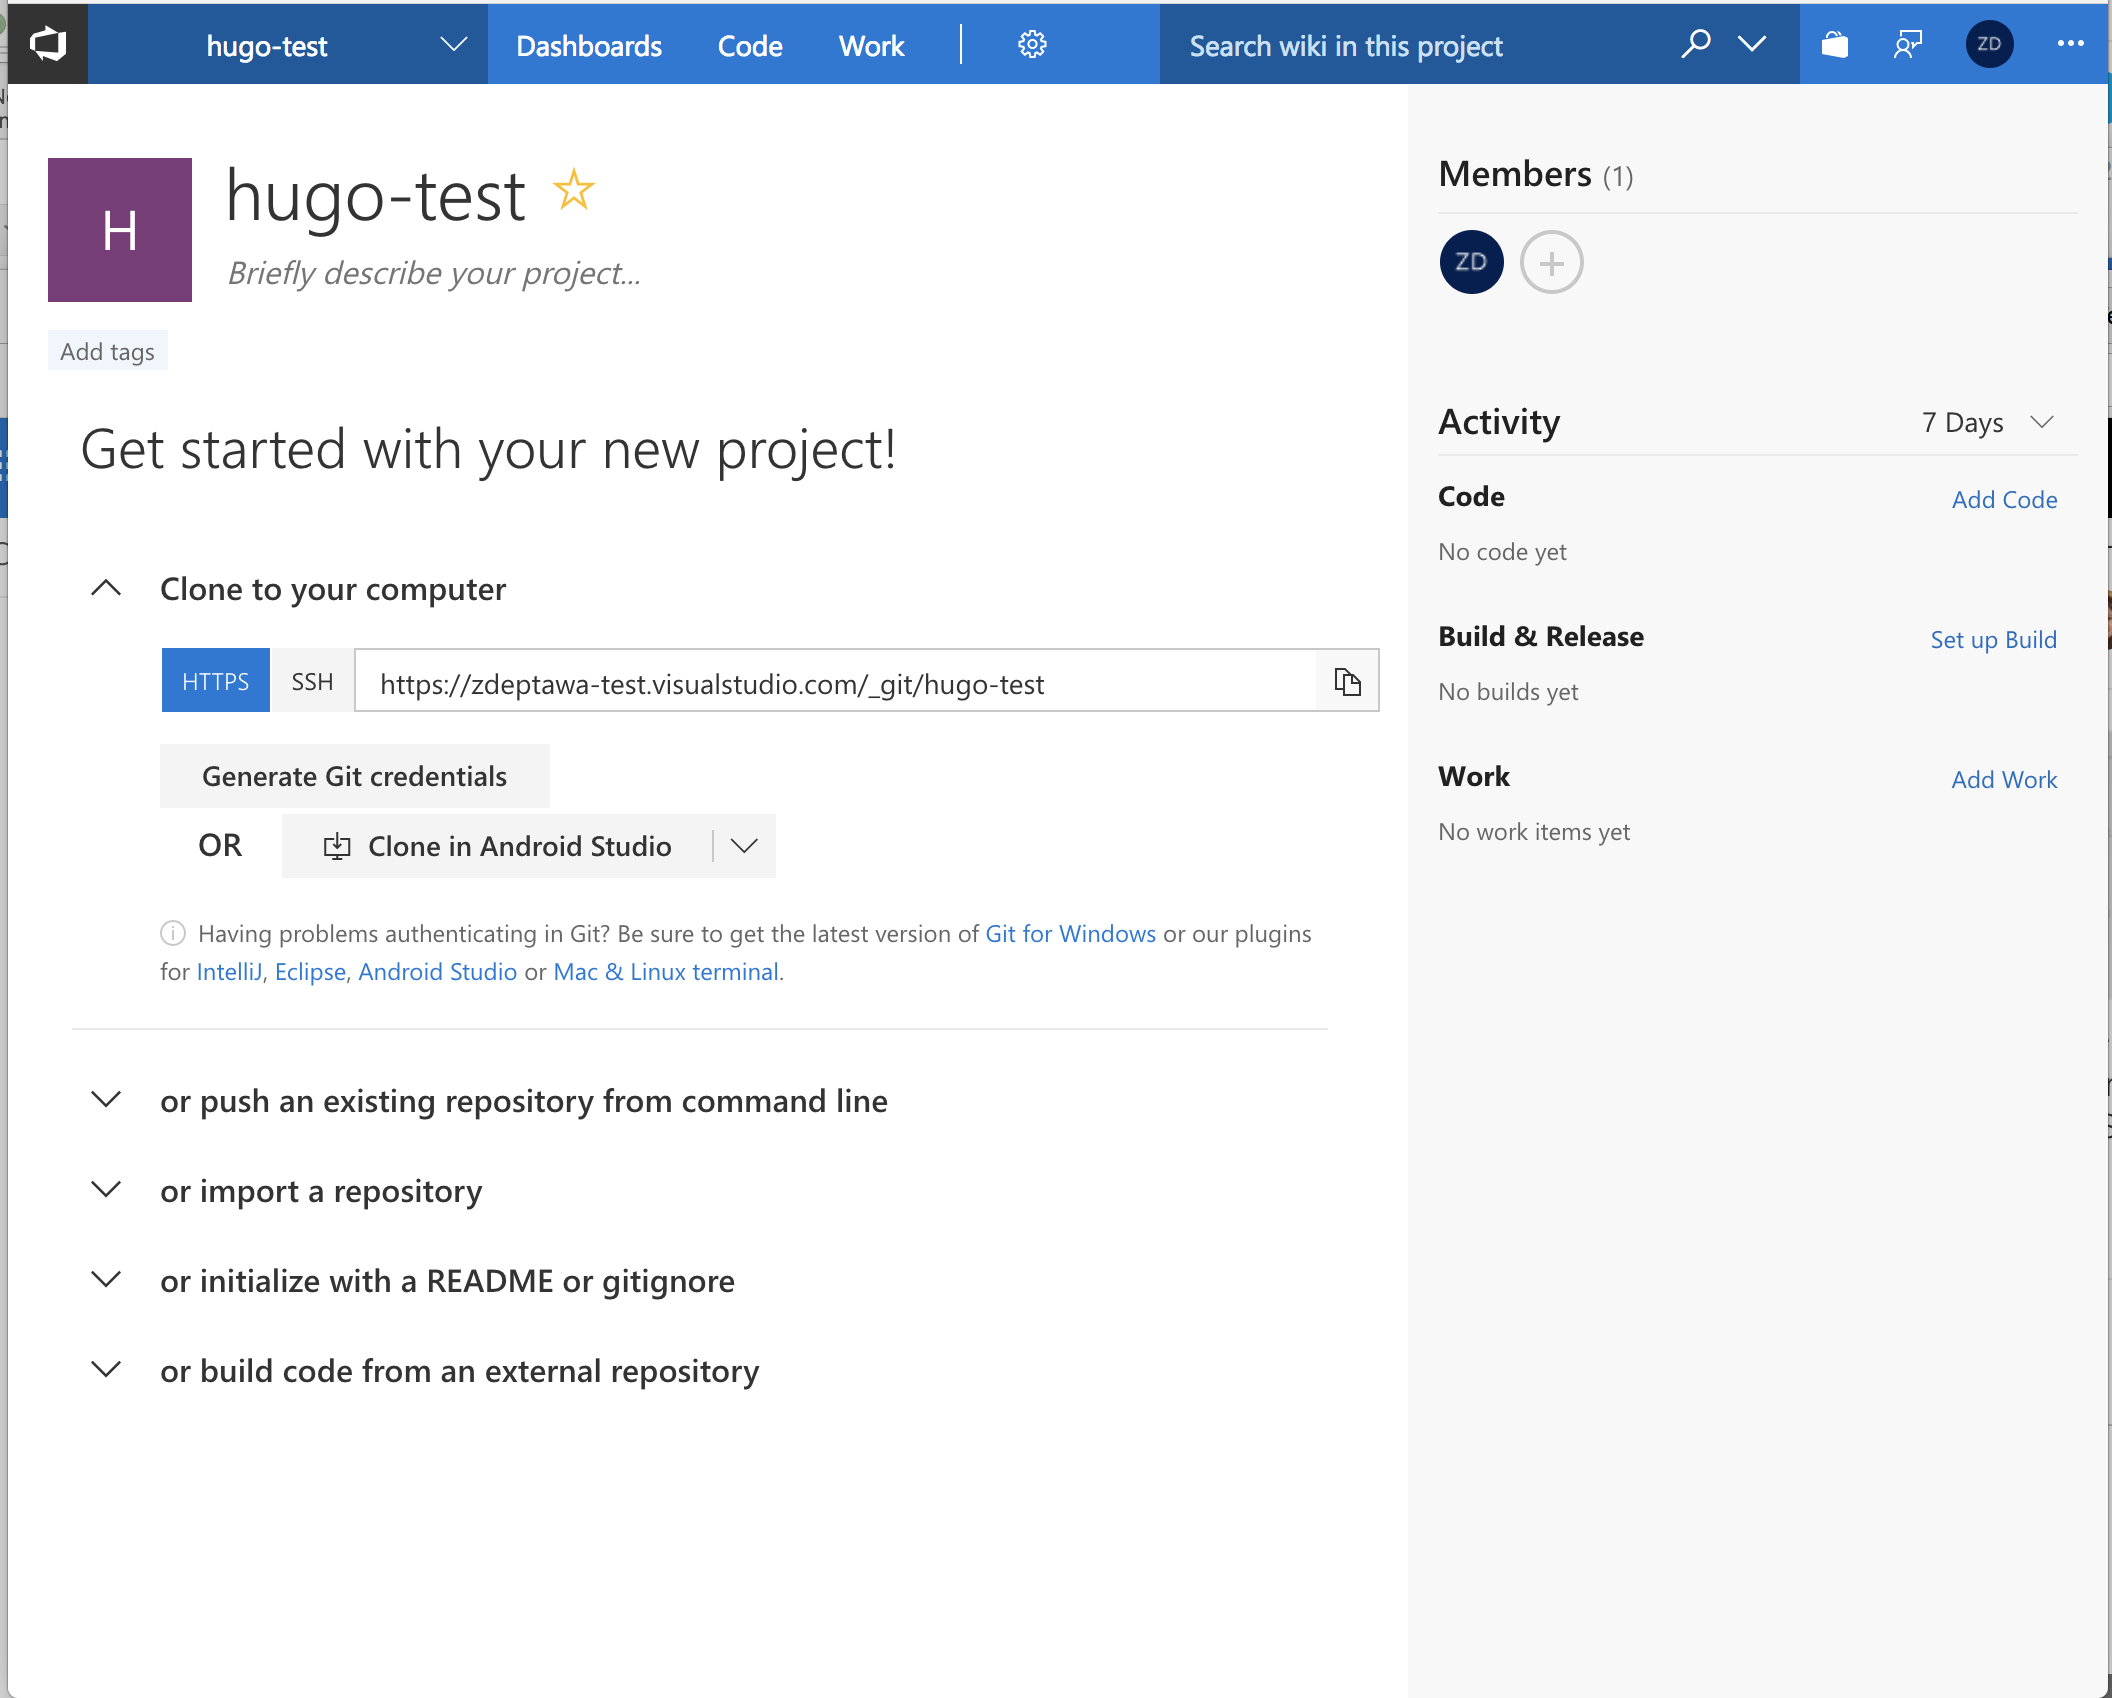
Now let’s get our code up into this project on VSTS! There are several ways to get started with your project. You can choose to clone the empty project to your local machine and start working in an empty repository, you can import a repository that already exists somewhere else, you can initialize your project as empty with a README or gitignore file, you can build code from an external repository, or you can push an existing repository from command line. Being we already have an initialized local git repository, we’re going to push from that existing repository from the command line interface. Let’s do it!
QUICK NOTE - If you have already set up Git credentials in VSTS, you can skip to step #3 below. If you haven’t set any up yet, start with step #1.
Under the
Clone to your computerdrop down, selectGenerate Git credentials.- Enter a password for your VSTS username to use for Git credentials.
- Click
Save Git Credentials. - NOTE - You may enter an
Aliasfor your user if you’d like, but this is not necessary. Using your entireuser nameis totally sufficient.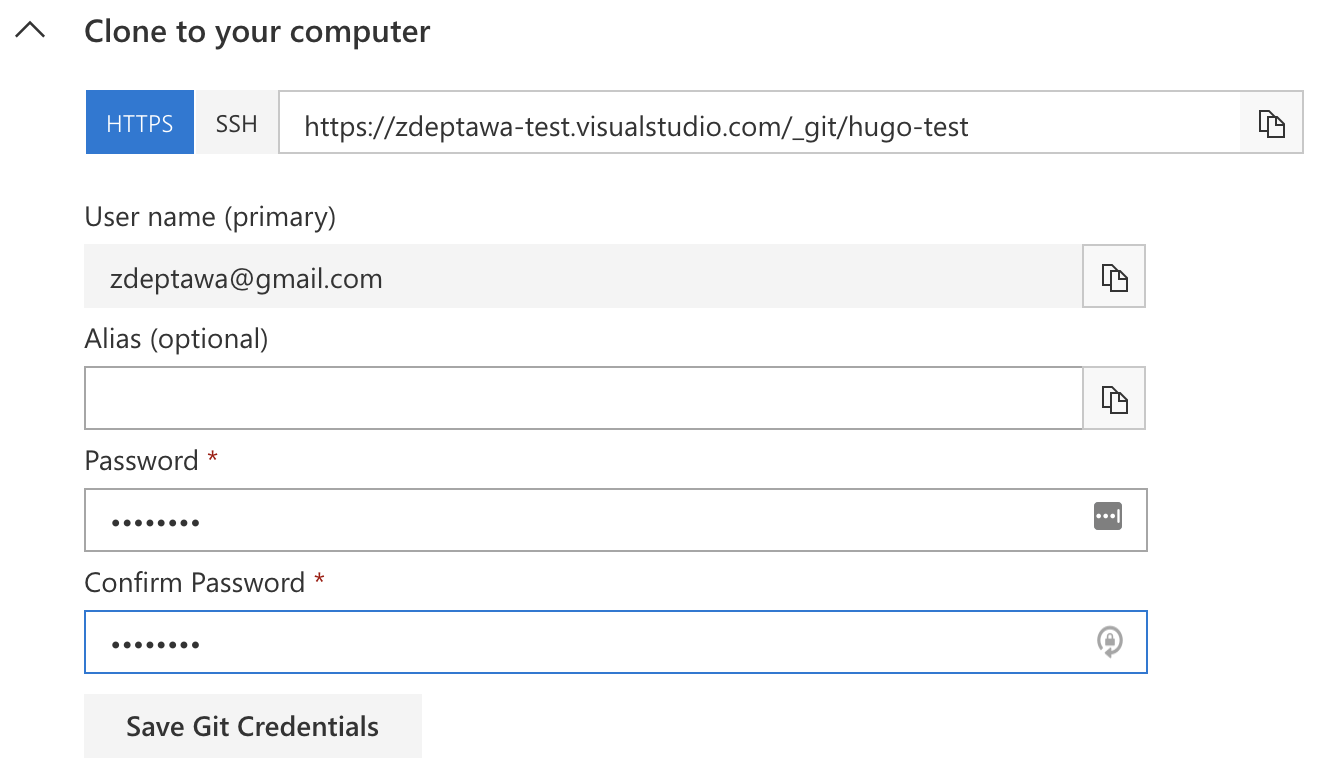
In your terminal, make sure you’re still in the new site’s folder. You can do this by running
pwd.Open the
or push an existing repository from command linedrop down.
Copy the
git remote addcommand and run it in your terminal.- My command for this tutorial is
git remote add origin https://zdeptawa-test.visualstudio.com/_git/hugo-test. This is setting our VSTS project as the remote repository for this local site/repository.
- My command for this tutorial is
We’ll need to stage the changes we’ve made to the local repository. These changes can be seen by running
git status. Rungit add *to stage all changes within this project for our initial commit to our VSTS project.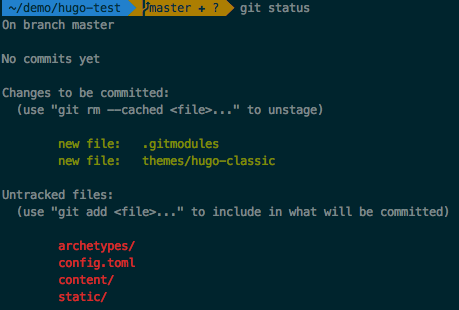

You’ll need to now commit these changes. Run
git commit -m 'initial commit'to commit the changes locally.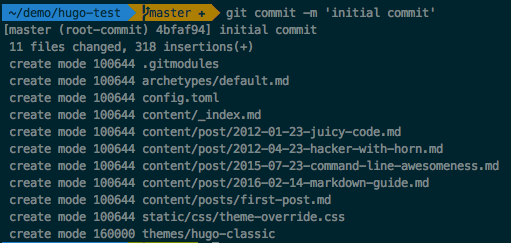
Copy the
git push -u origin -allcommand from the VSTS project’s landing page and run it in your terminal.- This command will push your local commit up to the VSTS project.
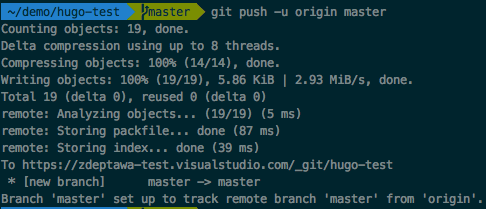
- This command will push your local commit up to the VSTS project.
Run
git statusto make sure there are no changes that are outstanding in your local repository.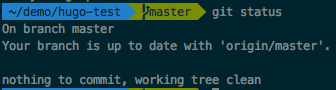
That’s all there is to it! You’ve just set up your Git credentials for your project, set up the remote origin repository for your local site’s version control, and pushed all of your current changes up to your VSTS project! :D
Setting up Azure App Services and linking VSTS
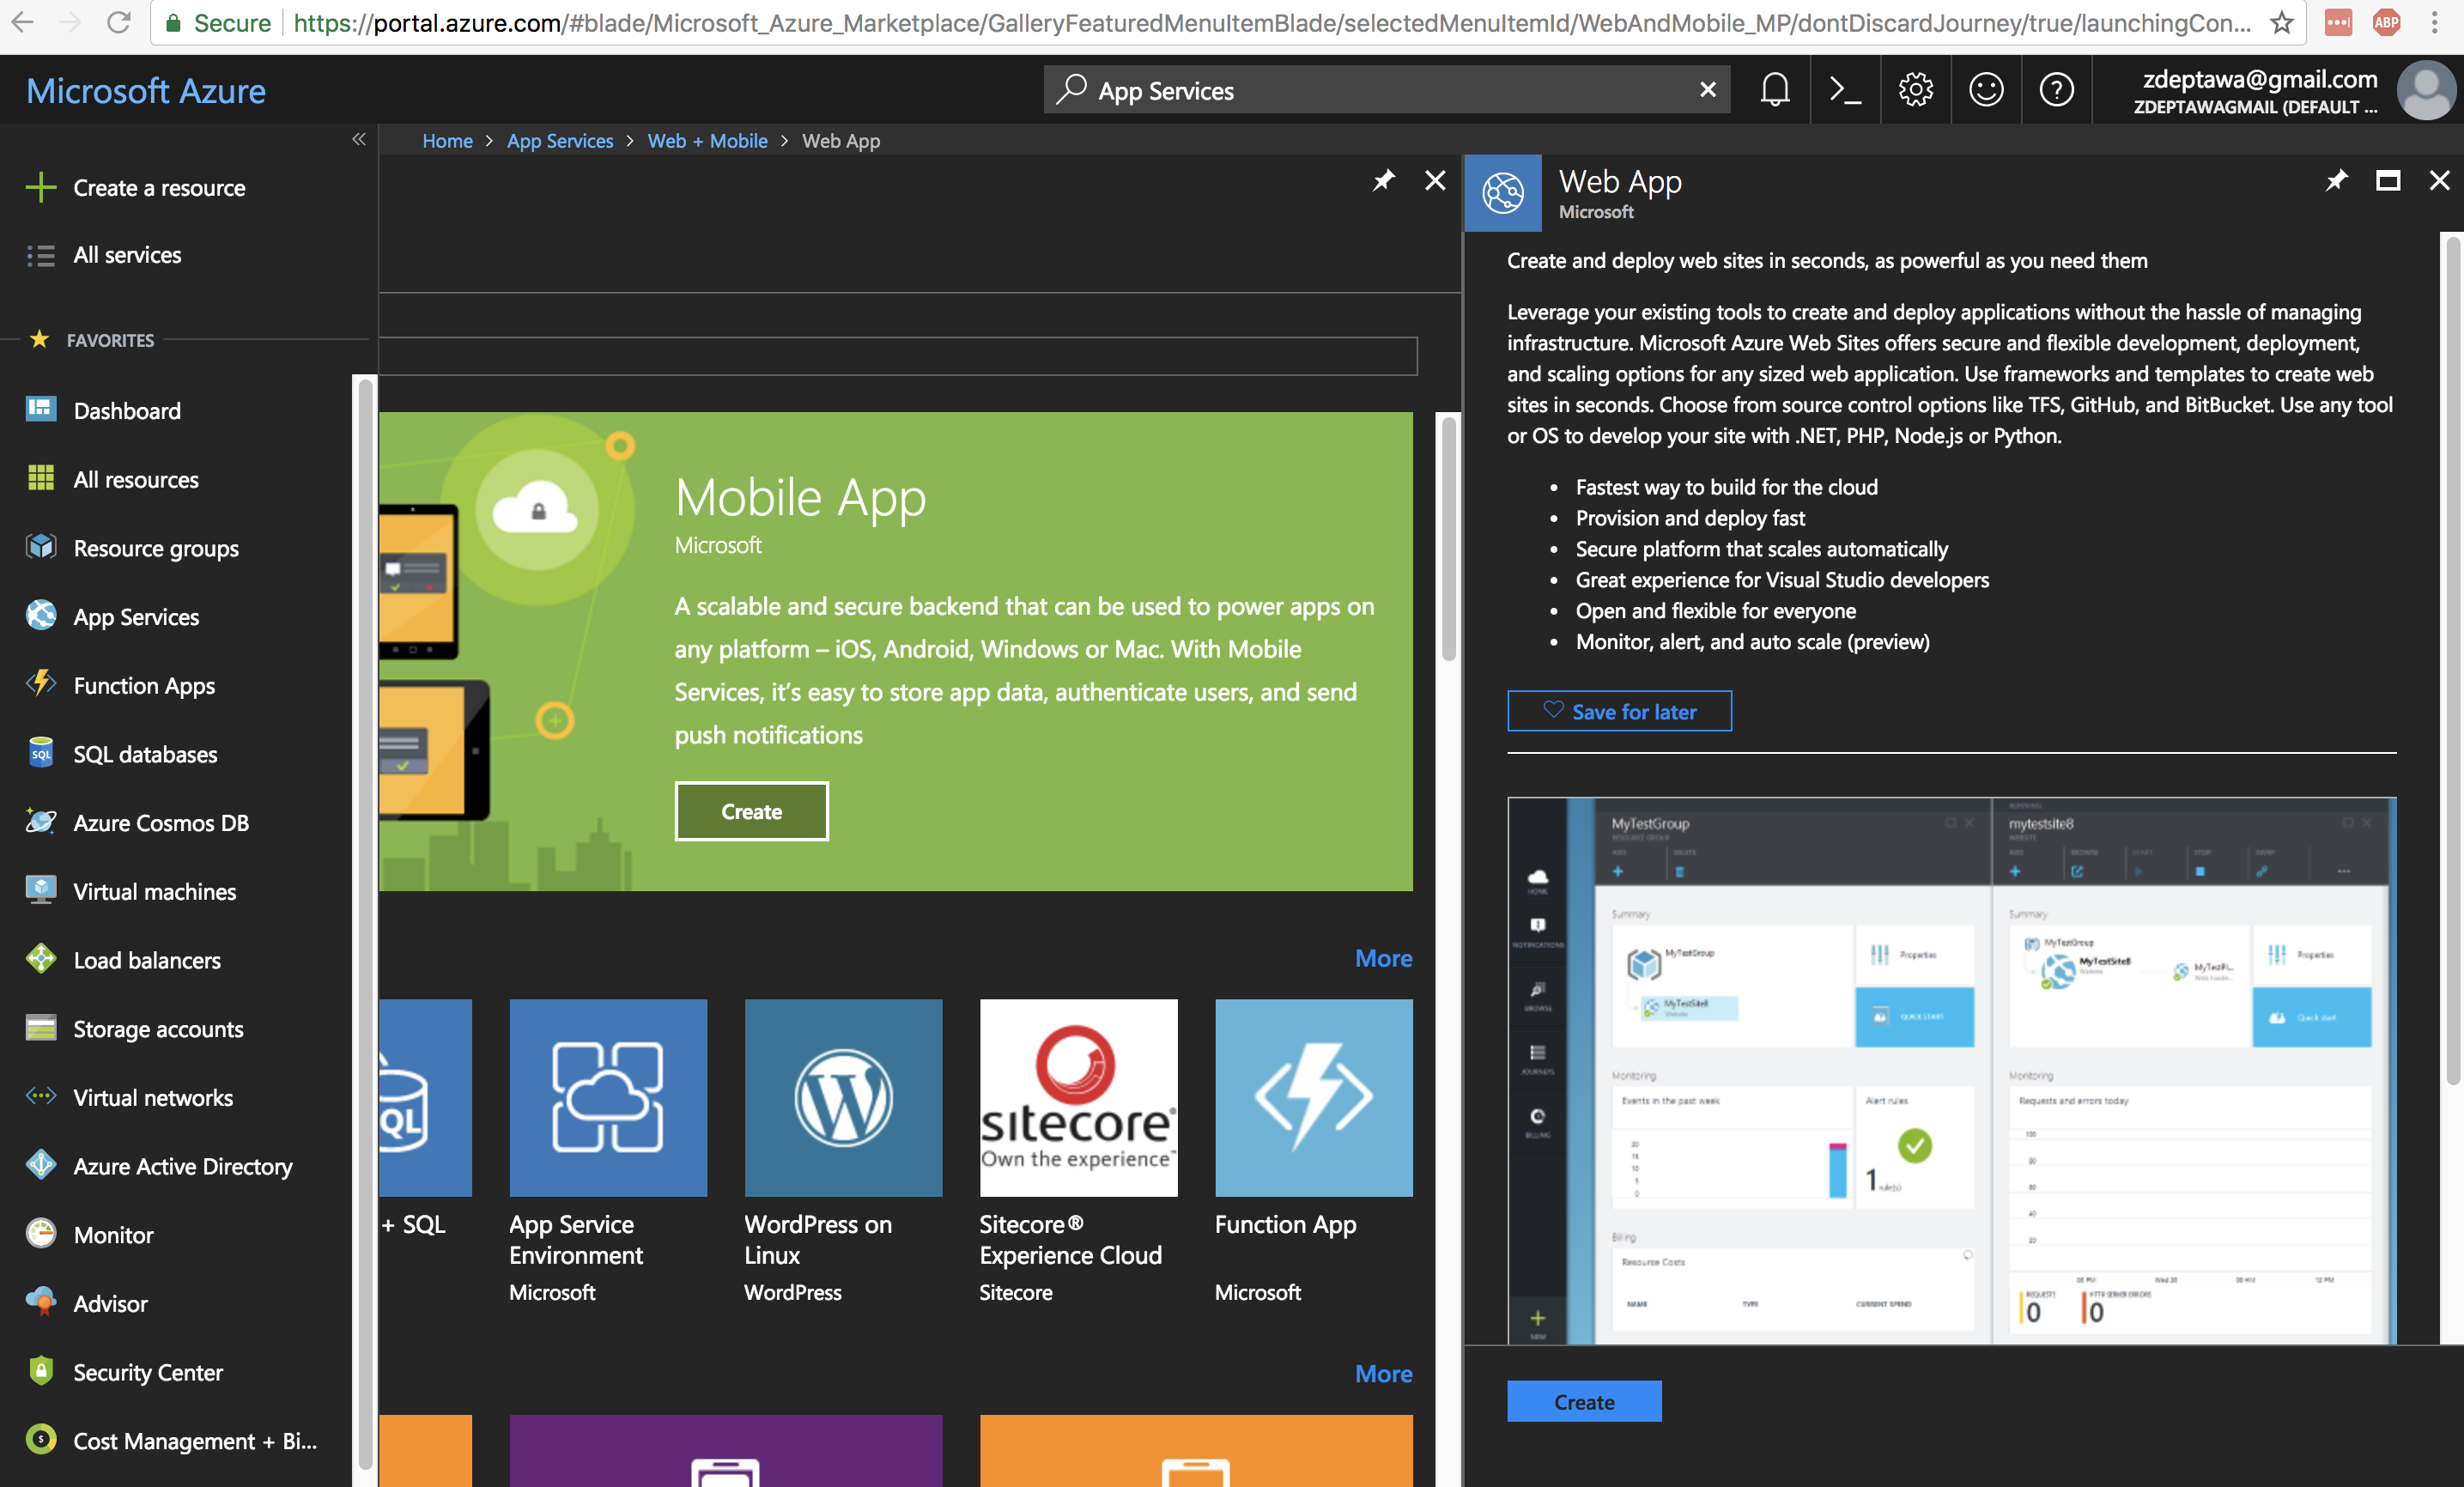
Step 6: Let’s set up an App Service web site in Azure!
Now that we have the site content pushed up to our VSTS project’s repository, let’s create our Azure App Service website for this project! You’ll want to be logged into the Azure portal for this portion!
Navigate to
App Servicesin the left-hand pane or through the search bar at the top by searching forApp Services.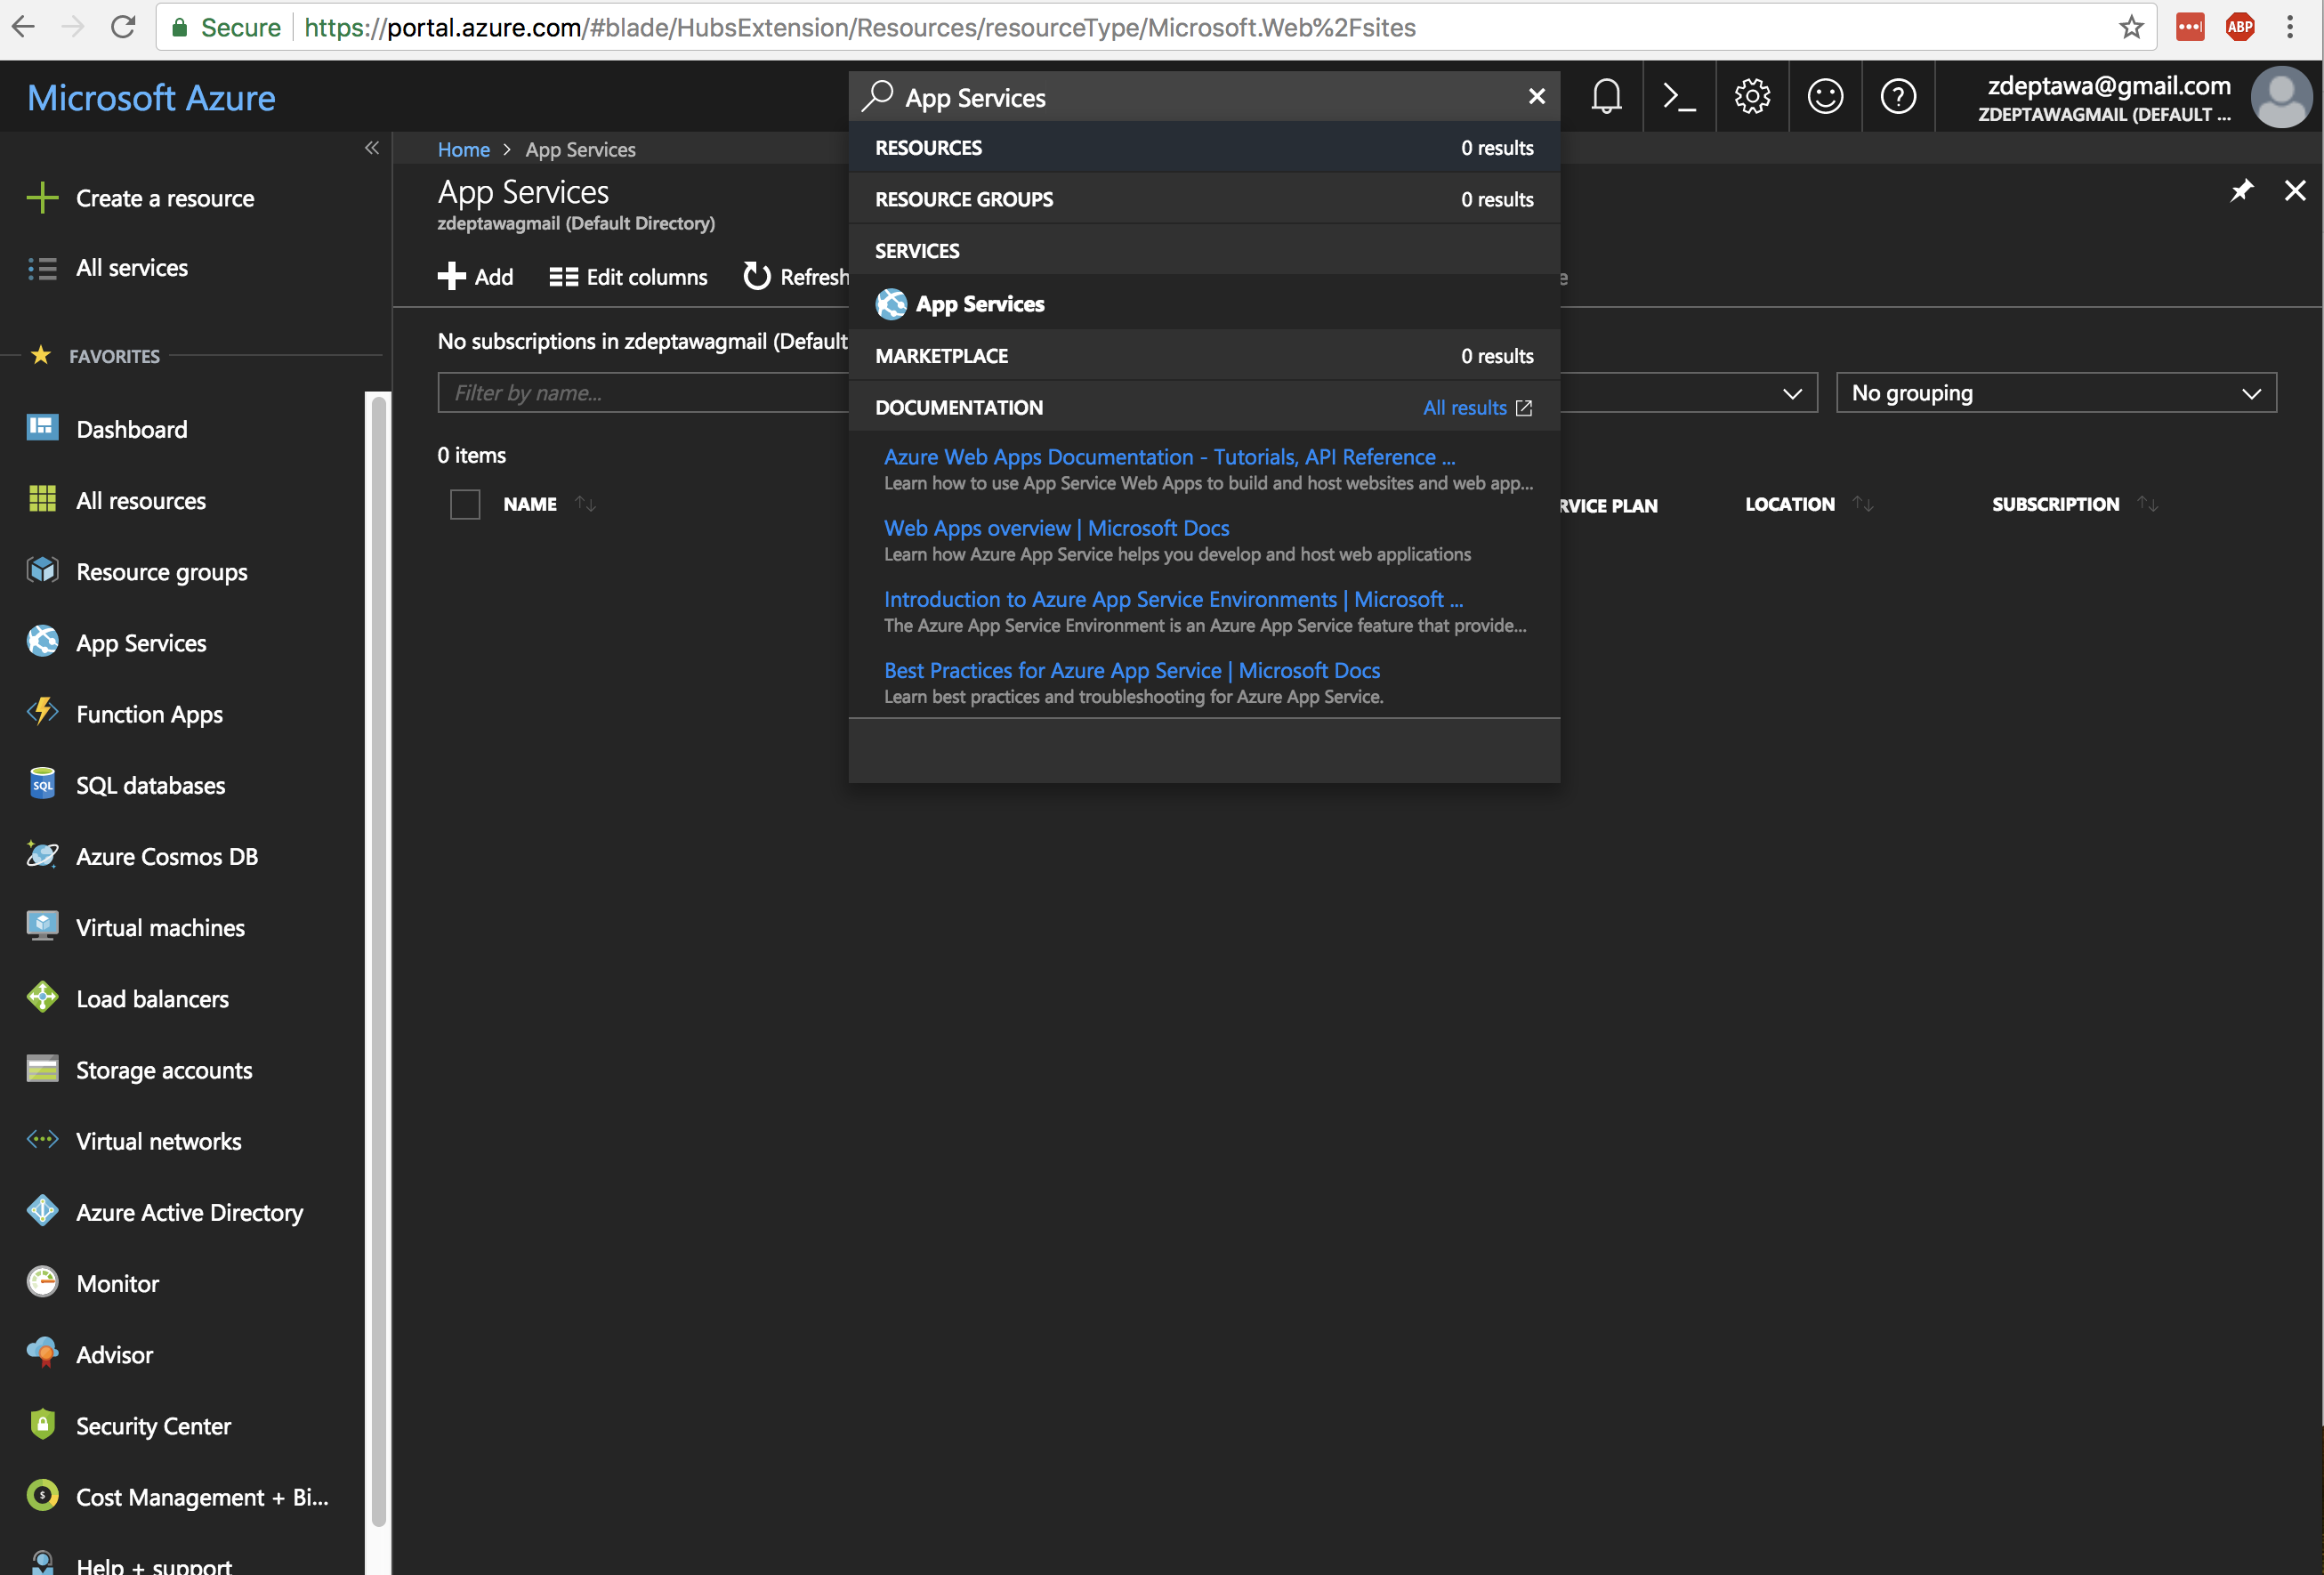
Click
Addunder theApp Servicespage header.
Select
Web Appon the right-hand pane.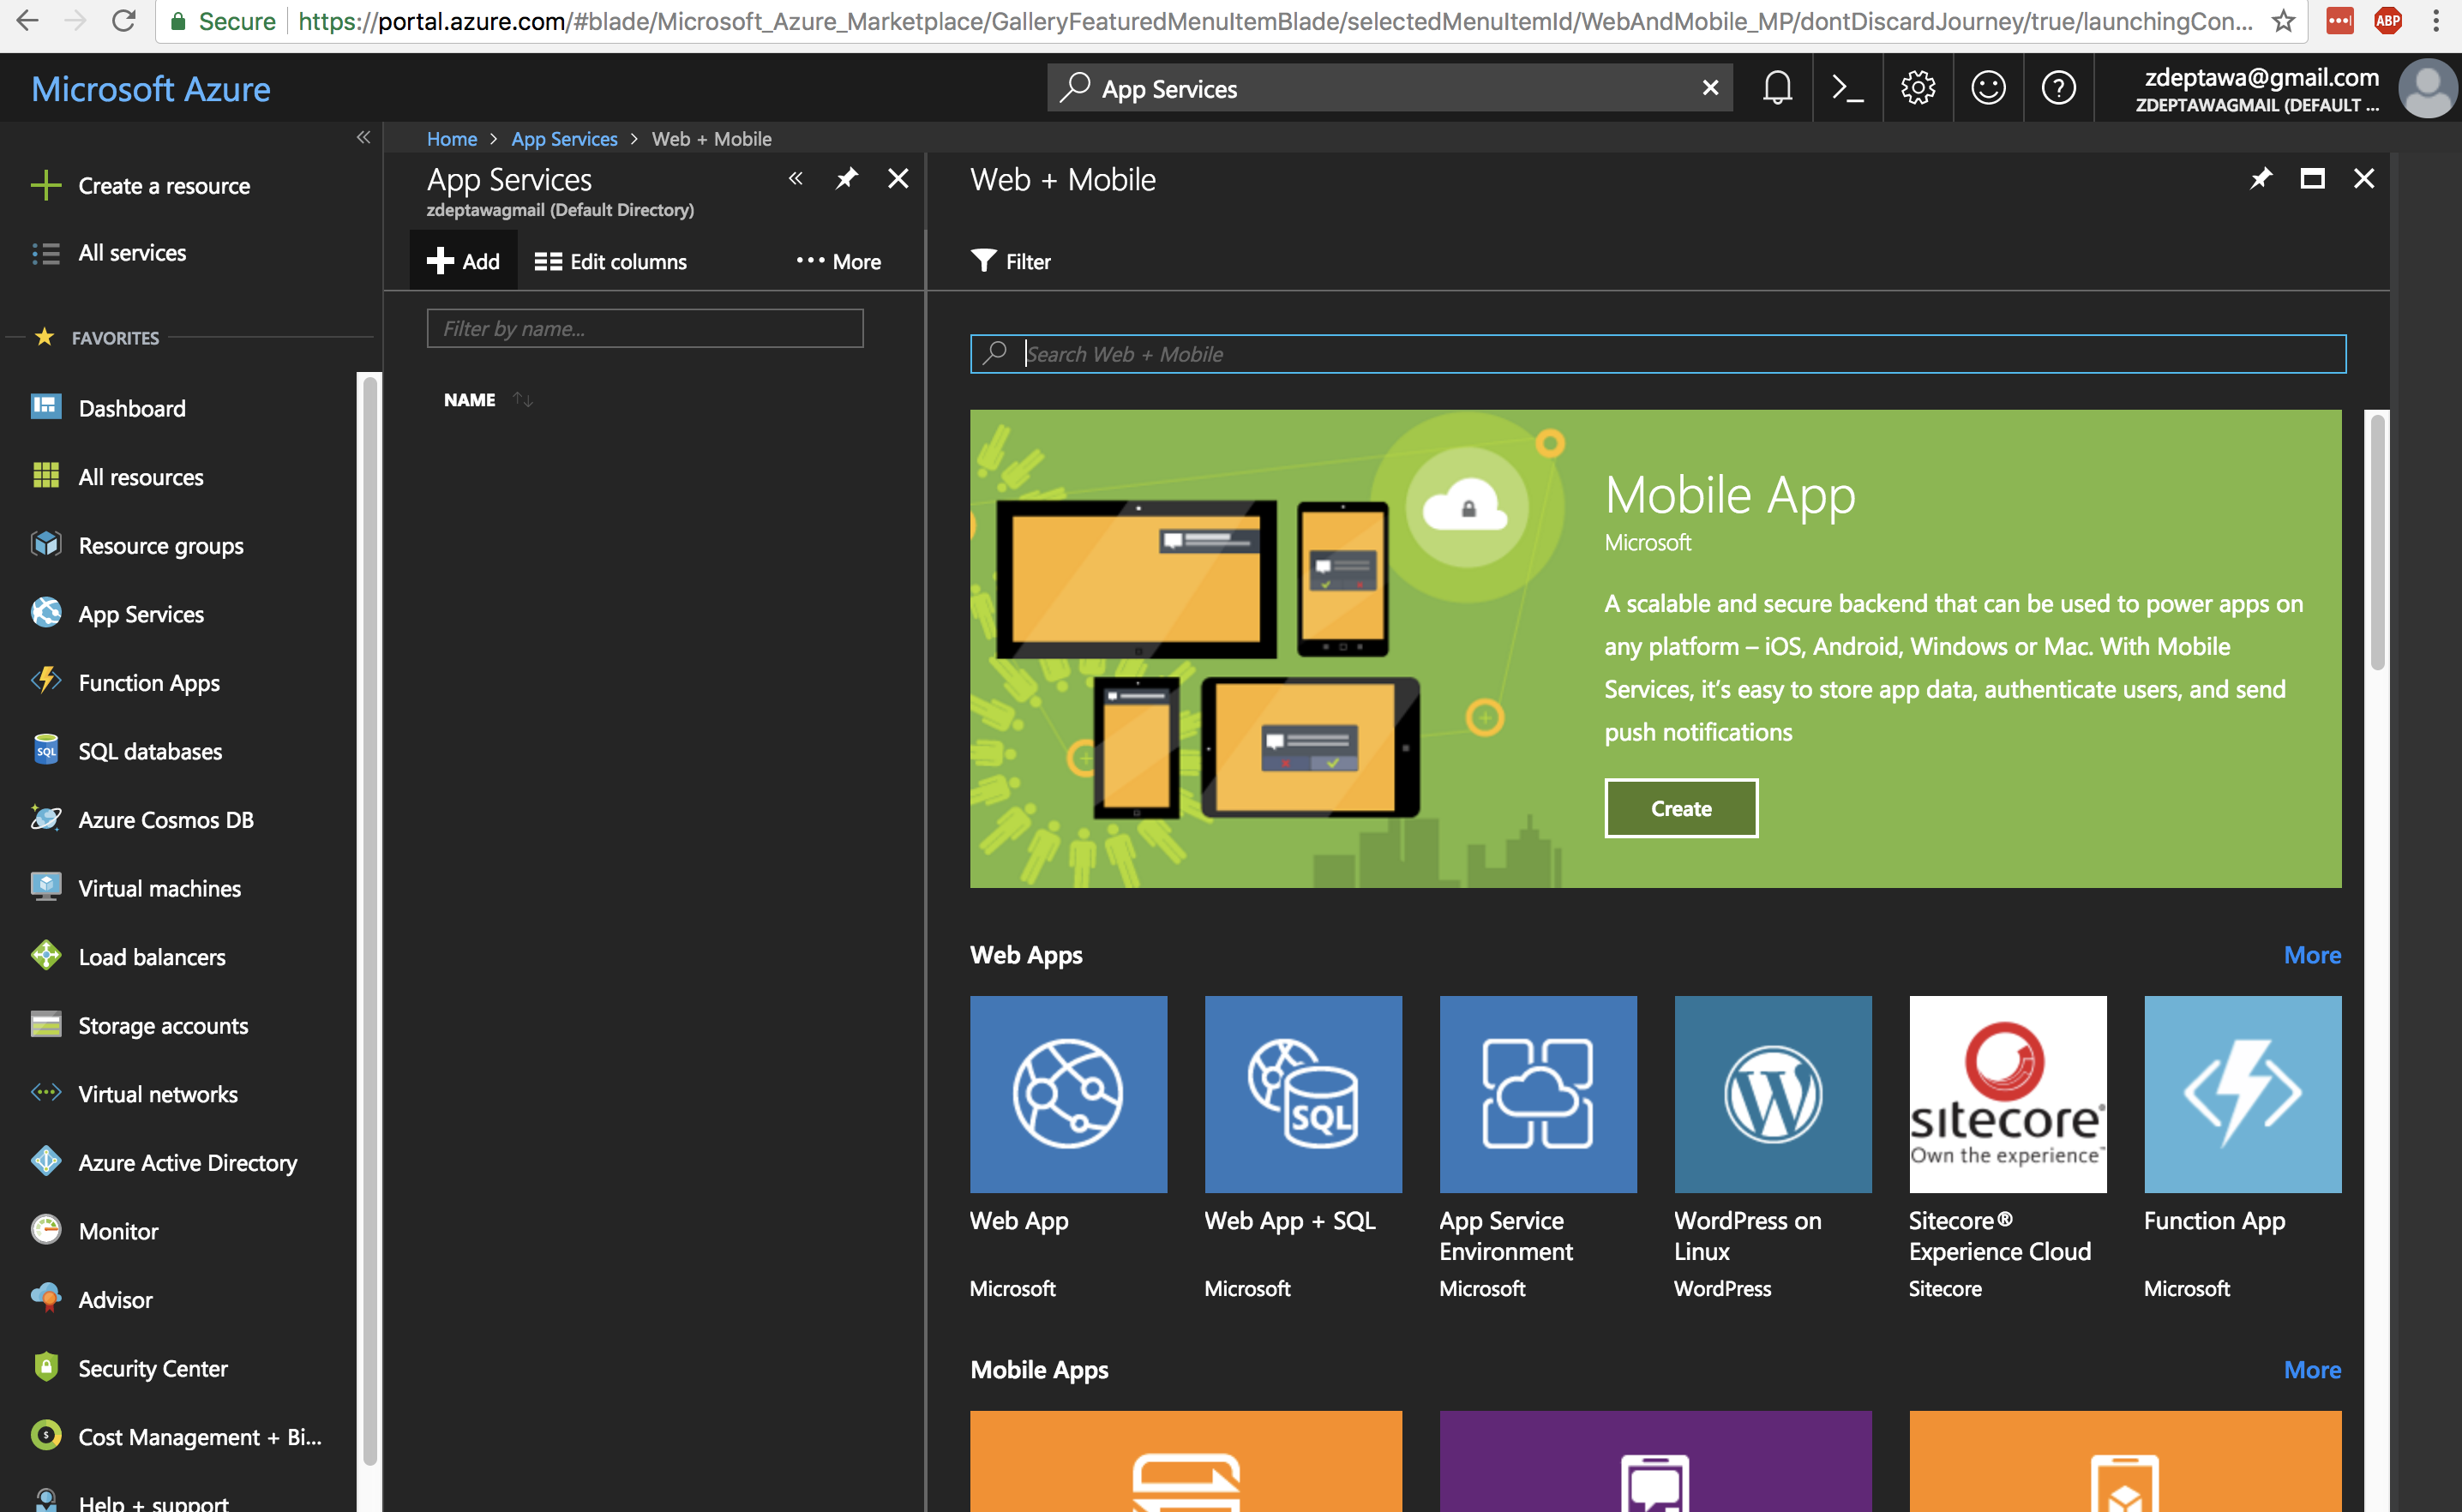
Click
Createat the bottom of theWeb Apppane.- NOTE If you don’t already have a subscription set up, you may need to do so at this time.
- NOTE If you don’t already have a subscription set up, you may need to do so at this time.
Configure the
Web App.Set an
App name. I chosehugo-test-zdfor the purposes of this tutorial.- NOTE - The
Web Appapp names are global and must be globally unique!
- NOTE - The
Choose your
Subscription.- We will be using the free tier of
App Services Web Apphere, so make sure you choose accordingly.
- We will be using the free tier of
Create or select an existing
Resource Group.- I chose to create a
hugo-test-zdResource Groupfor the purposes of this tutorial.
- I chose to create a
Select
Windowsfor yourOS.- I know, I know - why Windows!? I chose this because it’s currently the only OS in the
Web Appthat offers a free tier and we don’t have any requirements for Linux on this application.
- I know, I know - why Windows!? I chose this because it’s currently the only OS in the
Under the
App Service plan/Location, chooseCreate new.- IMPORTANT This has to be done to ensure you’re on the free tier! IMPORTANT
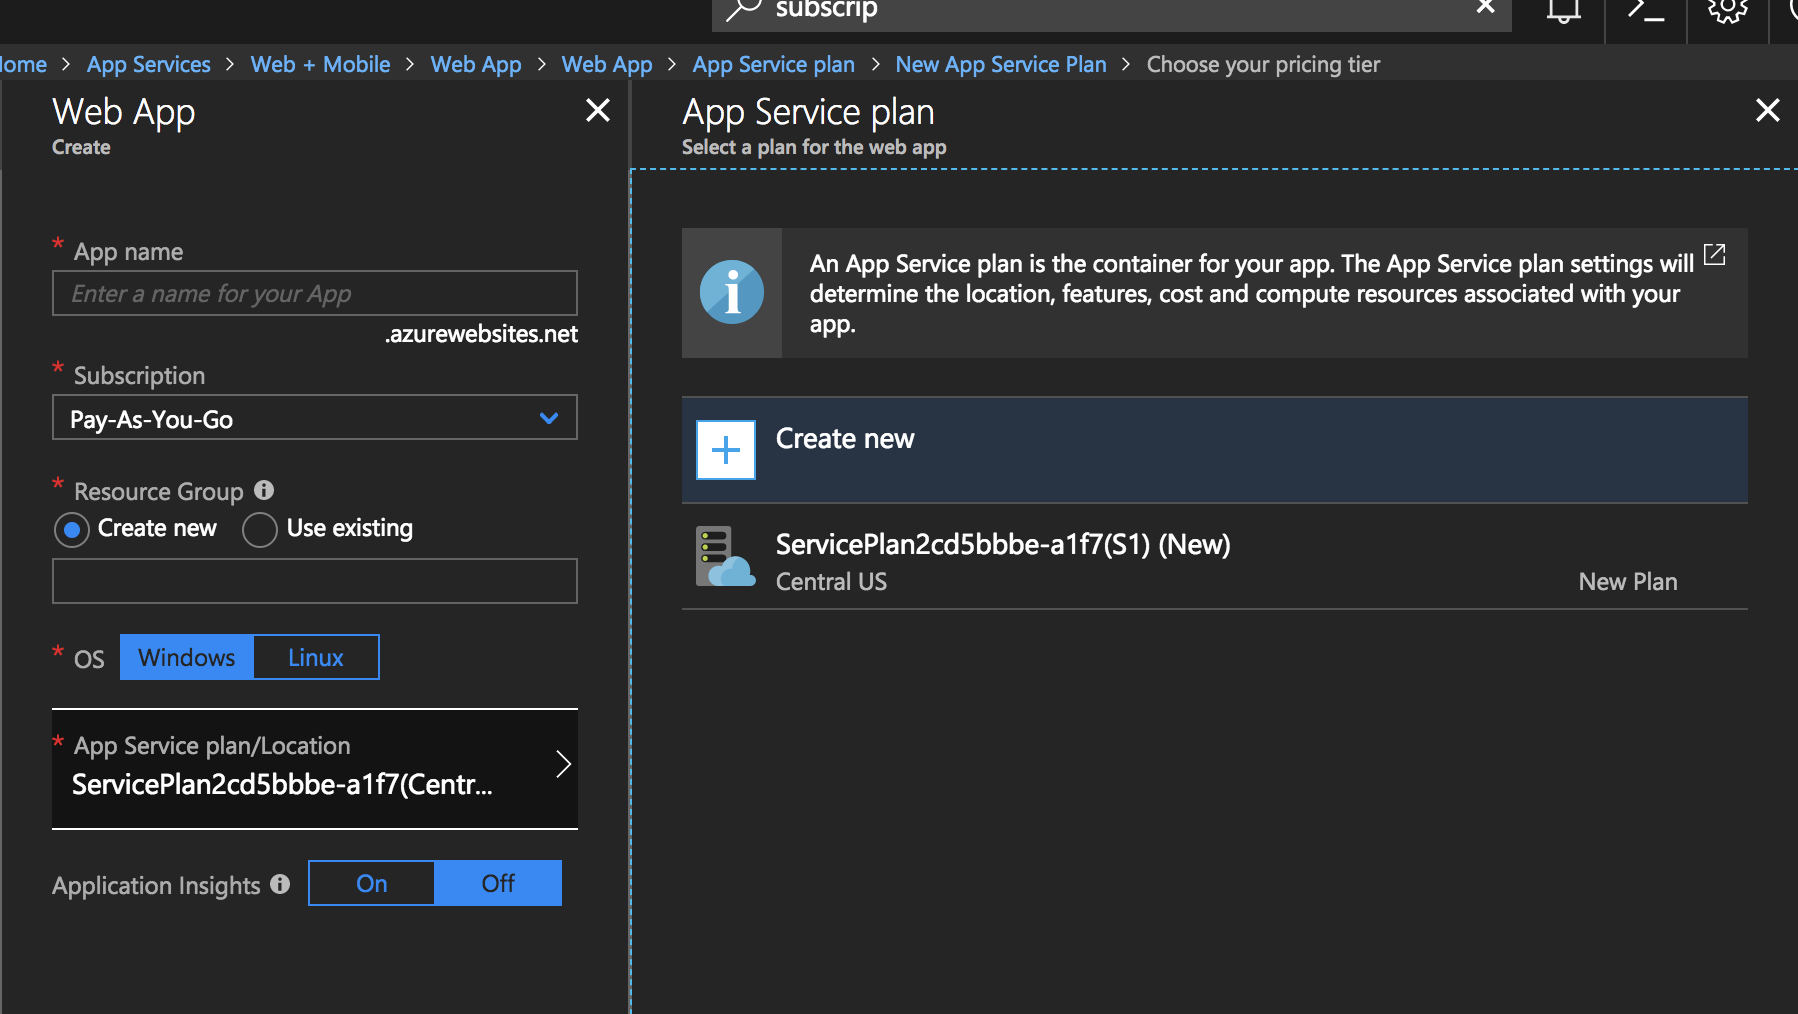
- IMPORTANT This has to be done to ensure you’re on the free tier! IMPORTANT
Enter an
App Service planname.- I chose
hugo-testfor the purposes of this tutorial.
- I chose
Set the
LocationtoCentral USfor theNew App Service Plan.Click on
Pricing tierand selectF1 Freeat the bottom left to select the free pricing tier, then clickSelect.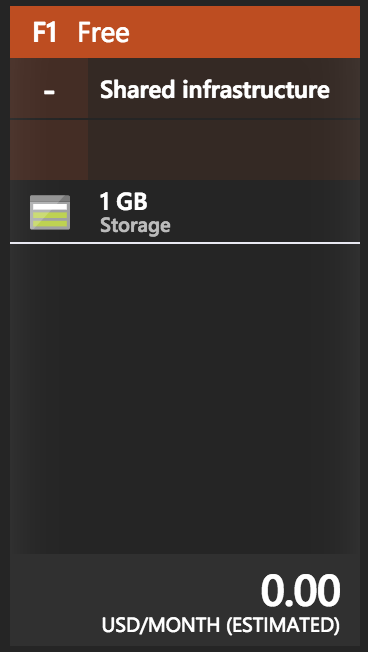
Verify the
Pricing tiernow showsF1 Free. If it does, clickOkin theNew App Service Planwindow.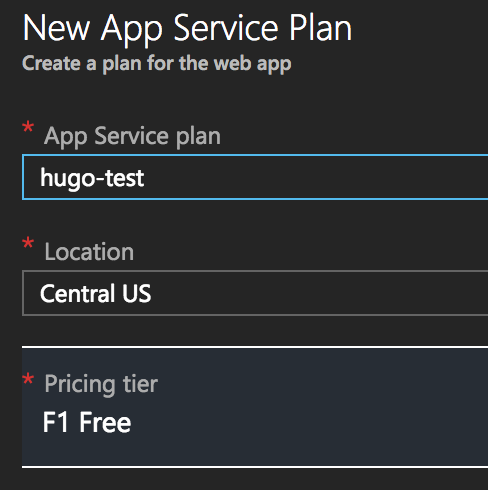
You should now see your new
hugo-testApp Service plan/Locationlisted on theWeb Apppane.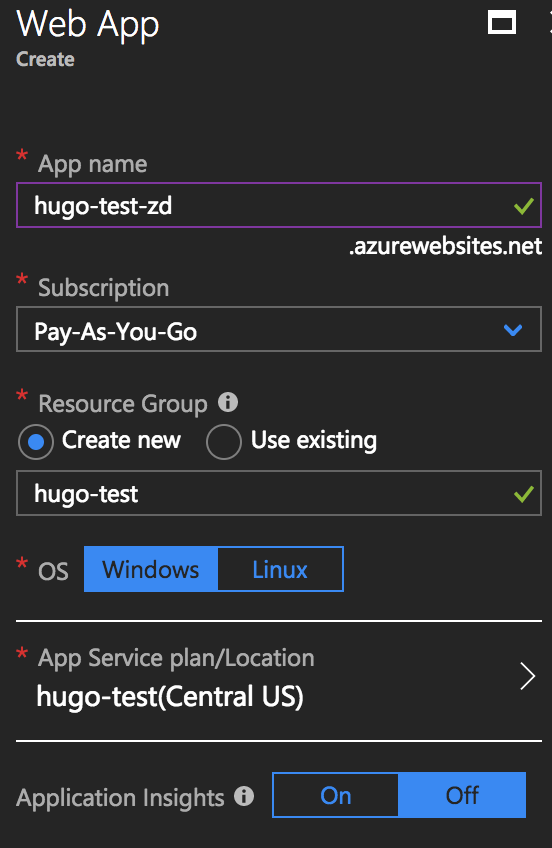
Double check all information on the
Web Apppane, including theApp Service plan/Locationsetting.If all looks well, click
Createto create yourWeb App! :D
The portal throws you back to the App Services pane while your app is building, but you’ll notice the little notification bell icon is keeping track of your build.
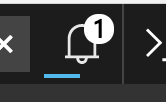
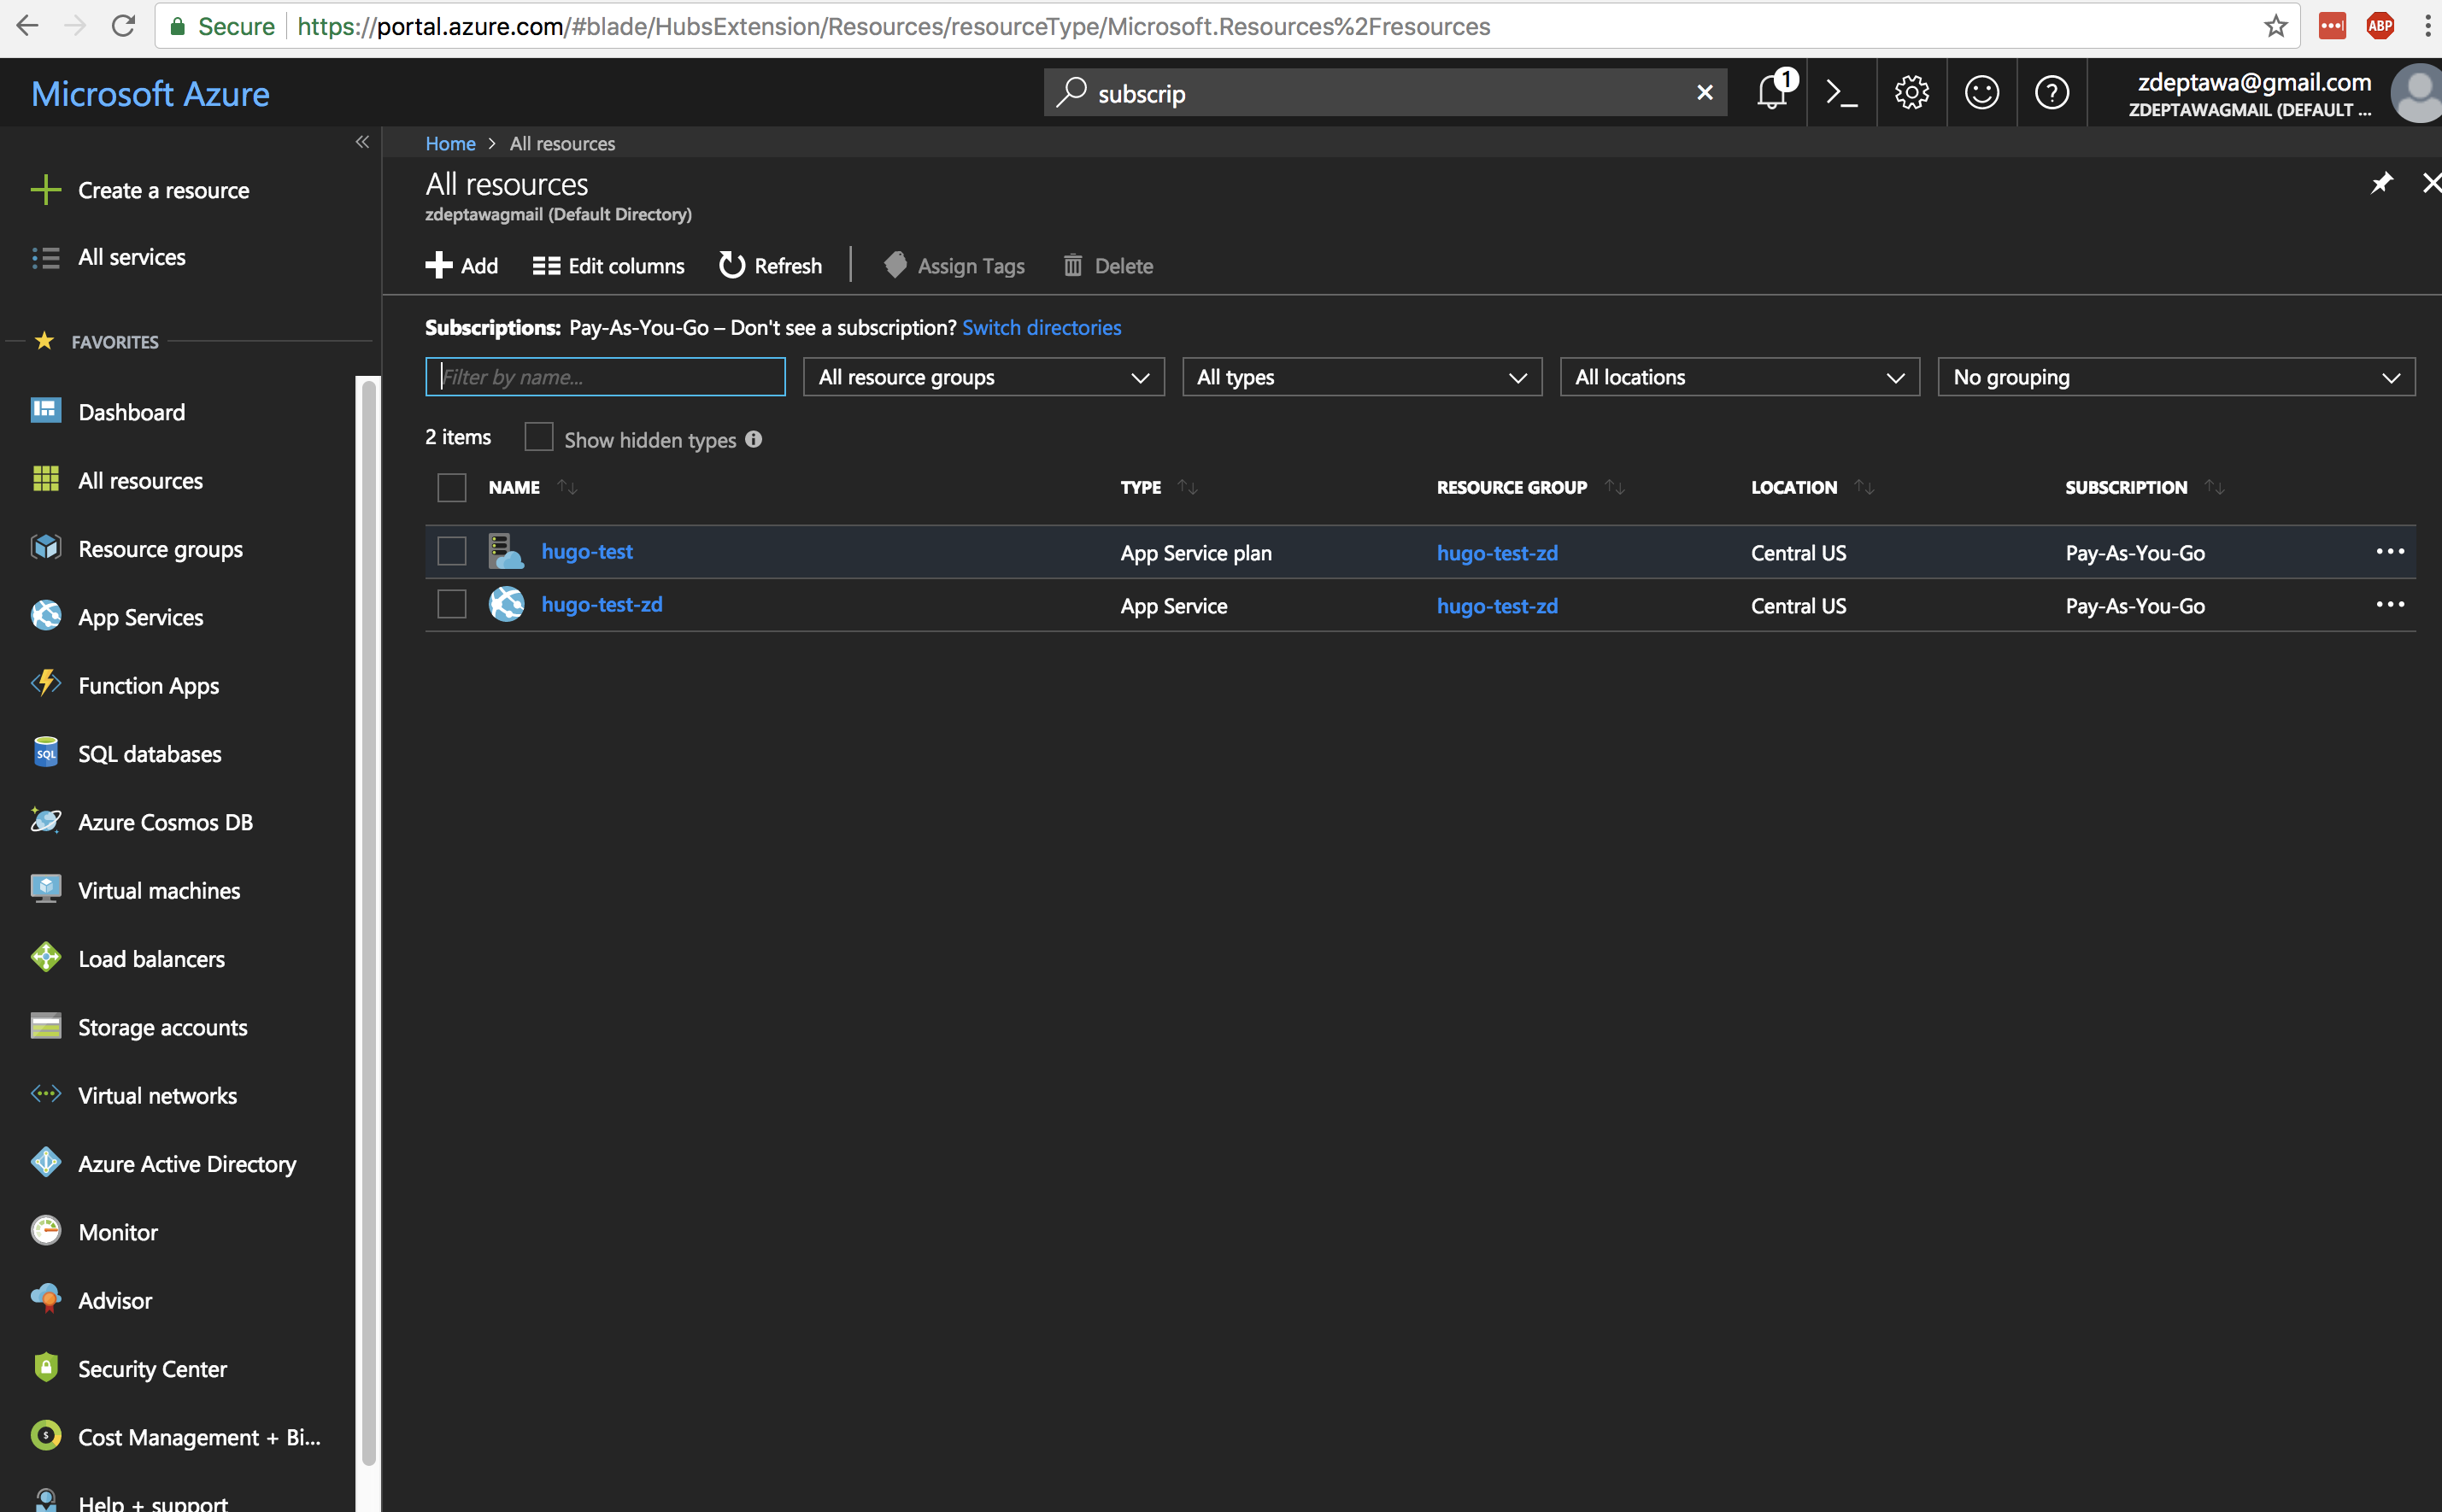
When your application is finished deploying, you can click on All resources on the left-hand navigation bar to show your newly created resources.
Step 7: Let’s link our VSTS project repository with our new Web App in App Services!
Alright, we’re almost done with the configuration! Now that we have our new Web App running in Azure App Services and our site’s code being version controlled and stored in VSTS, let’s link our VSTS repository to our new Web App so it can use the repository to build and deploy the site using Continuous Delivery (currently in preview at the time of writing this article).
For this step, you’re going to need to start out in the new Web App’s pane in the portal. If you’re still on the All Resources page, simply click on the name of the new web app you created, and it will take you there.
IMPORTANT - Your VSTS account needs to be connected to your Azure account for this section to work properly. There are a few scenarios that can play out here, but this article can help you ensure your VSTS account is properly connected to Azure so that it can deploy directly to an App Services Web App.
Click on the
Continuous Delivery (Preview)option under theDEPLOYMENTsection of your Web App’s navigation pane and selectConfigure.
- NOTE - If you’re unable to click on
Configure, you may need to make sure your VSTS account is properly connected to Azure first.
- NOTE - If you’re unable to click on
Set the proper options in the
Configure Continuous Deliverypane.Choose
Source codeto configure continuous delivery to use your VSTS project’s repository. Being my VSTS account and my Azure account were already connected and I only have a single project, all settings in theSourcepane were prepopulated for me.- Select
Visual Studio Team Servicefor theCode repository. - Select the proper
Visual Studio Team Services accountwhere your Hugo project lives. - Select the
Projectfor your Hugo deployment. - Select the
Repositorywithin that project that holds your Hugo deployment. - Select the proper
Branchthat relates to the branch you want to use for these deployments. I’m using themasterbranch, but you could use a different branch if you’d like. - Click
Okon this pane to save your settings. - NOTE - If you see no options here once you select
Visual Studio Team Serviceas yourCode repository, go back and make sure your VSTS account is properly connected to Azure first. If the two accounts can’t communicate, you won’t be able to see any information for your VSTS account inside your Azure portal.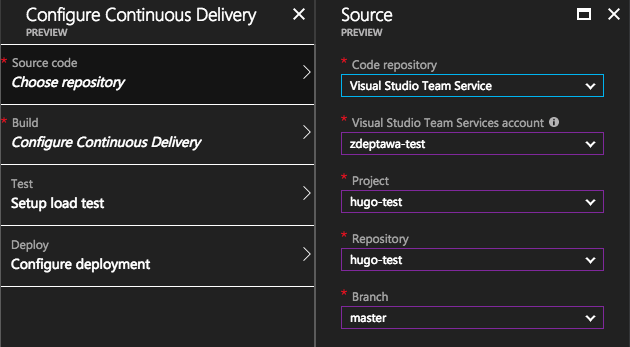
- Select
Choose
Buildon theConfigure Continuous Deliverypane to configure the build settings for this continuous delivery.- Change
Web Application frameworkto reflectStatic Webapp. - Change
Path to application codeto reflectpublic. The reason we’re doing this is the actual site code for your Hugo site lives in the folderpublicwithin your repository and not in the root of your repository. - Click
Okon this pane to save your settings.
- Change
Load testing is outside the scope of this tutorial, so we will leave
Load testset toNOon theSetup load testsection.- Ensure
Load testis set toNOand clickOk.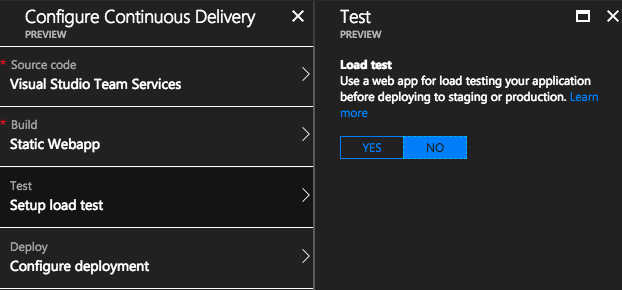
- Ensure
When you click on
DeploytoConfigure deployment, you’ll notice that the free tierApp Service Planwe are currently using does not allow deployment slots.- Nothing to change here. Click
Ok.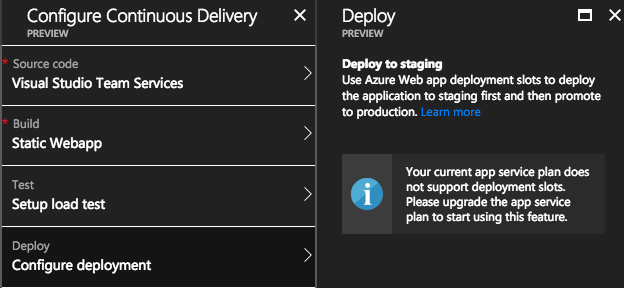
- Nothing to change here. Click
Once you’ve got everything configured, click
Okin theConfigure Continuous Deliverypane to finalize yourContinuous Deliveryconfiguration!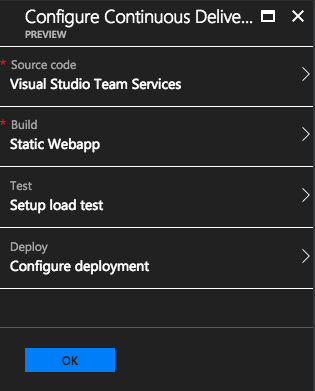
Once you’ve done this, you’ll see the portal kick off the configuration of your Continuous Delivery!
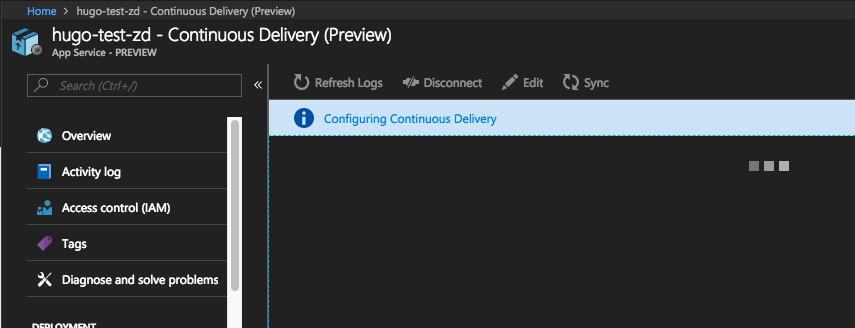
When the Continuous Delivery set up is complete, you’ll notice that a build is automatically triggered for your application with those configuration options that you’ve set.
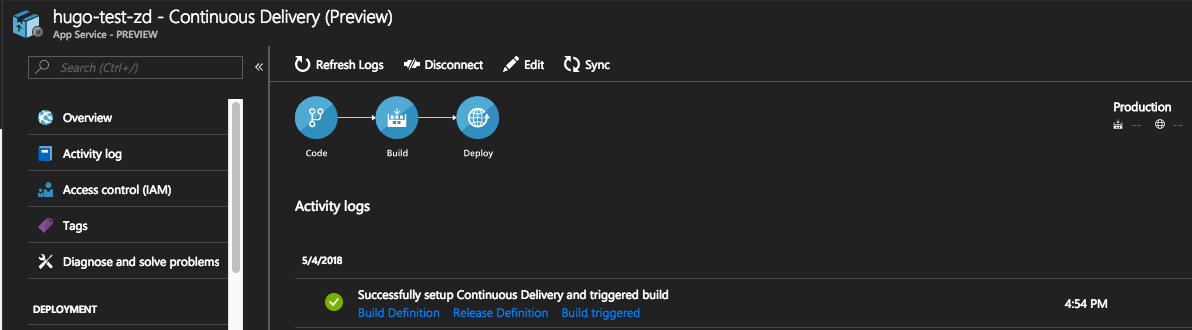
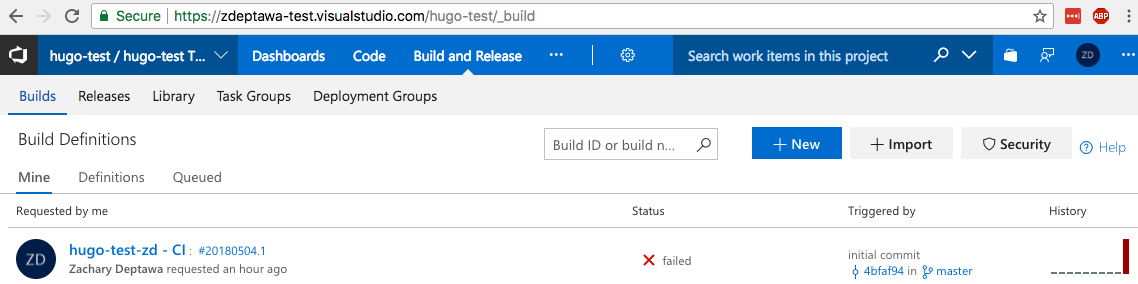
Go ahead and click on Build triggered under the first entry for your Activity logs. It will send you directly to this build of your VSTS project. Let’s take a look at how mine went!
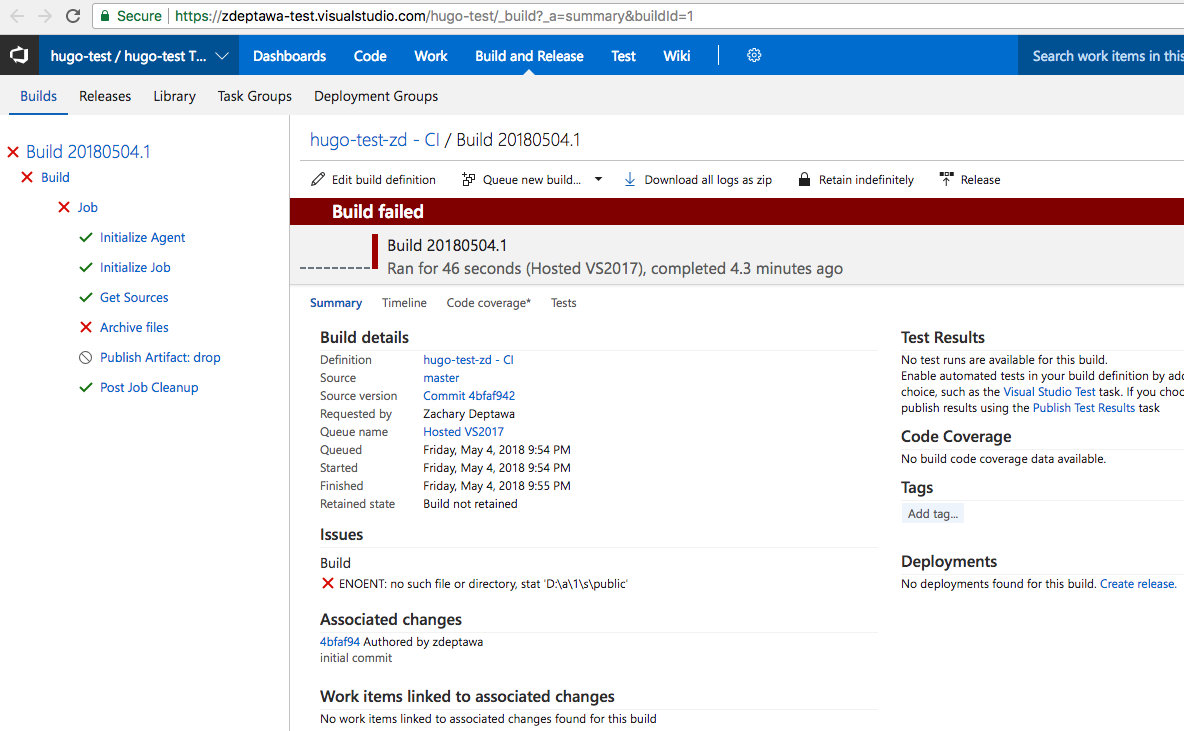
Yes, build failed!!! Oh, wait a second… that’s not right. I double and triple checked my settings on this - what could have gone wrong? (╯°□°)╯︵ ┻━┻
Troubleshooting
Step 8: Let’s figure out what went wrong with the VSTS Build!

Everything was going so well! Let’s look into this and see if we can figure out what happened and how we can get our blog back on track.
On the left navigation pane in the VSTS Build that failed, you’ll notice something super handy.
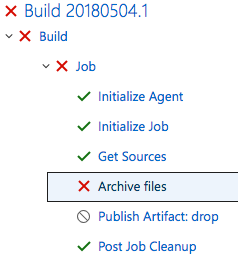
Notice those red X marks and green check marks on different parts of the navigation there? That gives us a super quick visual as to where we hit a wall. You’ll notice the overall build failed, and as we drill down we can see the job failed. Once we drill down into the job, we start to see that the initialization of the agent went fine, the job initialized fine, we were able to get the sources, and we were even able to do the post job cleanup. However, it looks like we may have an issue with archiving the files from the source.
Let’s look at the Logs within Archive files. When you click on Archive files, it should default you to the Logs output for this specific build.
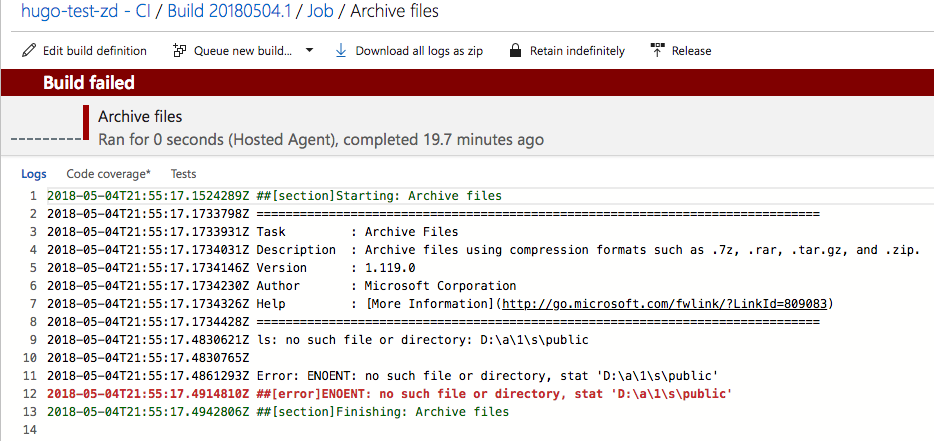
Oh! It looks like the build was not able to locate a public folder in our VSTS project’s repository. How can that be? Hugo’s a static site generator that generates a public static with the simple code and markdown you’ve written. That can only mean our repository has the wrong code… or I forgot to generate and commit the public content for the site. I’d love to tell you that this wasn’t my fault, but let me show you how to use the code in your repository to generate the public folder locally based off of the example site data we’ve prepopulated your repository with.
Now, I know what you’re thinking. “Not so fast, Zack. We’ve already tested my site locally and the content was there. I saw it when we tested via the browser. Why is there no public folder if my local testing was working?” That’s a great question, and I’m glad you asked it.

When you ran the hugo server command, you locally generated the actual content for your site and served it via a light weight webserver out of memory and not from the disk. This command uses the files in the directory to generate and display the site for testing, but it does not commit those generated files to disk. Why is this? While you’re running hugo server, it will watch as you’re changing content and will update your locally run server in real-time by regenerating content that has changed. This allows you to work on your site without having to generate the content or commit any of the generated content to disk until you’re ready. When you are happy with what you see, you can then generate the static content if you so desire.
To give you an example, I’ve had a hugo server running locally on the repository of this very blog as I’ve created this entire tutorial. What it’s allowed me to do is work on the tutorial, save changes to my work, and immediately see all of the changes live in my browser. This gives me a near-instant feedback loop and allows me to iterate fairly rapidly. It’s an awesome feature of how Hugo works. =]
What we need to do is generate the public content and get it pushed up to our repository. Once that’s done, we can see if the VSTS build is still failing and go from there.
Let’s jump back into the command line and get this missing public folder sorted, shall we?
Head back to the command line and make sure you’re in your VSTS project’s directory again by using
pwd.Let’s take a look at the directory structure and see if we have a
publicfolder.- Run a simple
ls publicinside the repository.
- Run a simple
Take a moment to curse the person who wrote this tutorial for wasting your time.
- He totally deserves it.
- He’s not even that funny.
Run
hugoto generate thepublicfolder contents for this site.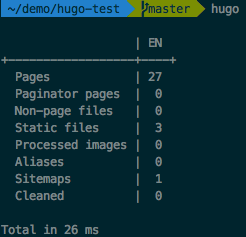
Run
git statusto see what changed within your local repository.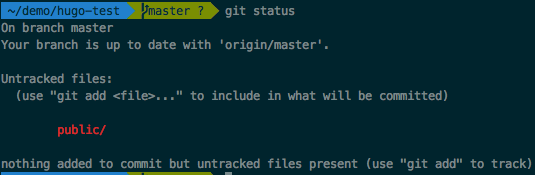
Run
git add publicto stage the newly createdpublicfolder for committing to your local repository.
Run
git statusagain to see what changes are staged now.- Take a look at all of those files Hugo generated based off our content in just 26ms!
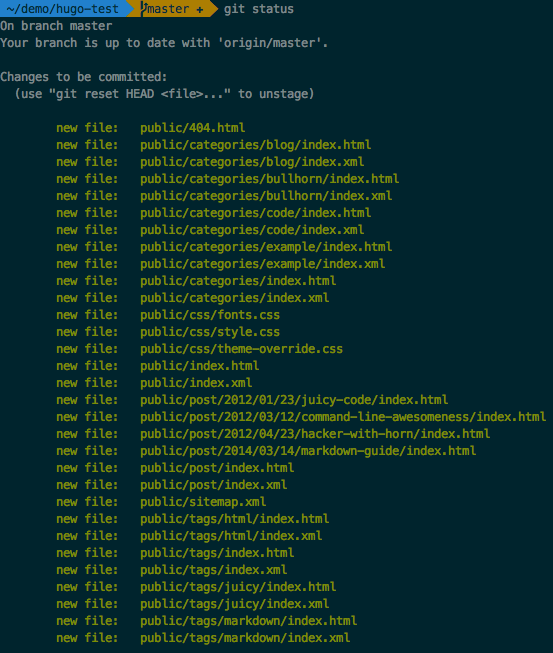
- Take a look at all of those files Hugo generated based off our content in just 26ms!
Run
git commit -m 'adding public folder'to commit the staged changes to your local repository.- Feel free to change the commit message from
adding public foldertowasting my timeas you curse the writer of this tutorial again.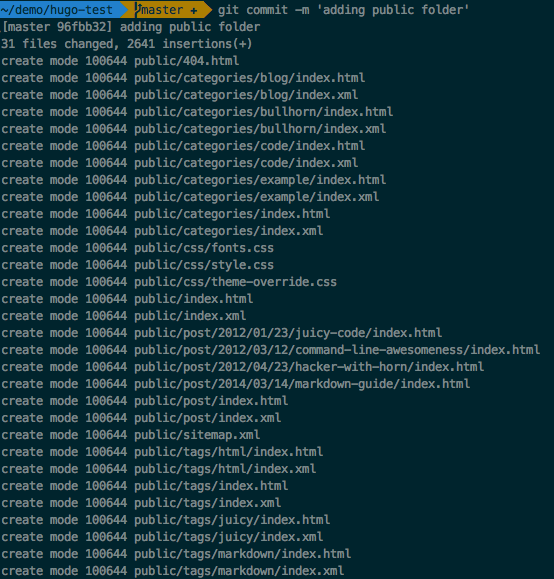
- Feel free to change the commit message from
Run
git pushto push those changes up to your remote repository in VSTS.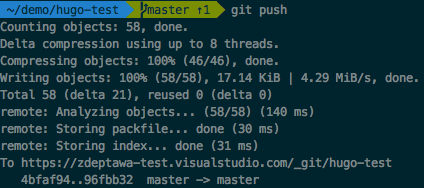
Alright, that should do it for our error. We’ve created the statically generated public folder via the hugo command and have committed and pushed those changes up to our repository in VSTS. Now what?
Magic happens, that’s what.
Do you recall how our initial build kicked off automatically after we configured Continuous Delivery? That is cool and all, but here is what is really awesome. If we take a look at Continuous integration within the Build Definition for this project in VSTS, we can see that we have the master branch for our repository set as include under the Triggers section.
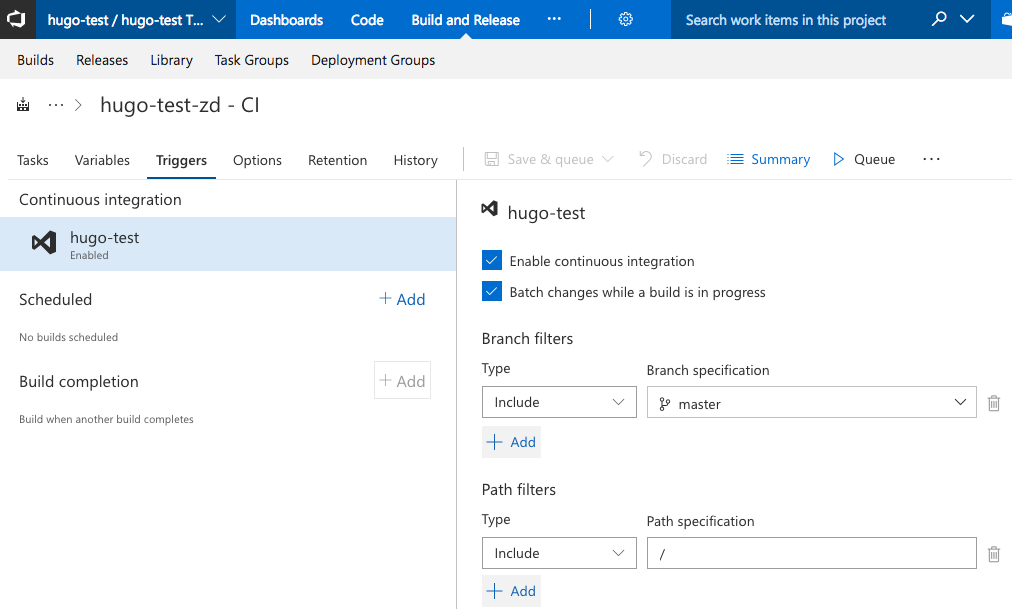
What this means is anytime a committed change happens on the branch of the repository you’ve configured to pull from as the source for Continuous Delivery in your Web App, a build will automatically be queued and kicked off using the latest committed code to that branch. That’s super cool. I promise. This tutorial doesn’t get into git workflow or using branches and pull requests, but you can do really interesting things in regard to automating your build by specifying different triggers and using different branches depending on your workflow and the needs of your project.
To give one quick example, say you have a development branch on your repository that everyone works out of. We will assume the master branch for this example is never committed to directly for your project. You would work solely out of the development branch until you had changes tested and ready to push into production, or the master branch. All changes made to your development branch would not be automatically queued for build and would be ignored given our current Triggers. Once your changes were ready to go into production, you could issue a pull request. Once those changes were tested and accepted by you or someone on your team, the code from the development branch would be merged into the master branch and a build would automatically fire off against those changes. To expand on this, imagine a development -> staging -> production workflow using branches for each deployment step to different environments for your application. The same git workflow could apply to deploy your application to a development, staging, and production environment automatically as your code moves through the workflow. Lots and lots of options, but these are just some basic examples.
This build error and simple troubleshooting process could have been avoided, but I made this mistake while writing this article and decided it was worth leaving in to show a very simple failed build troubleshooting workflow. It can be super frustrating to run into issues like this when you’re least expecting them, but it’s important to know that you have access to tools that simplify troubleshooting to help you find resolution quickly.
Sorry about that, table. ┳━┳ノ(・-・ノ)
Step 9: The fix is in, let’s watch it build!
Now that we’ve put the fix in place, you may have noticed a few things if you were watching in the VSTS portal. When the build failed, this is what could be seen in my Builds section for this project.
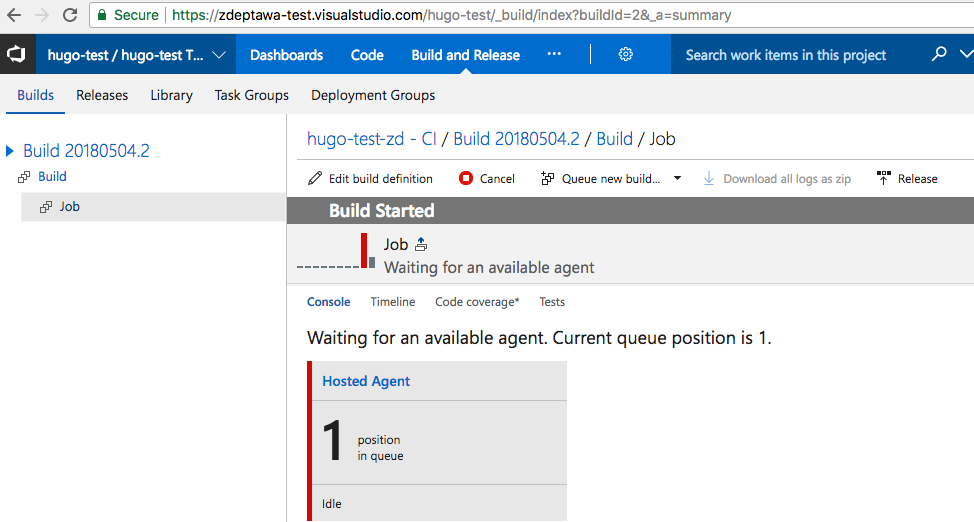
Once we made our public folder, committed, and pushed the change, the portal updated to show this in progress.

When I clicked onto the specific build for more information, I could see that it was awaiting an available agent to process my request.
When an agent was available, it took the request and processed it. Let’s take a look at how it went…
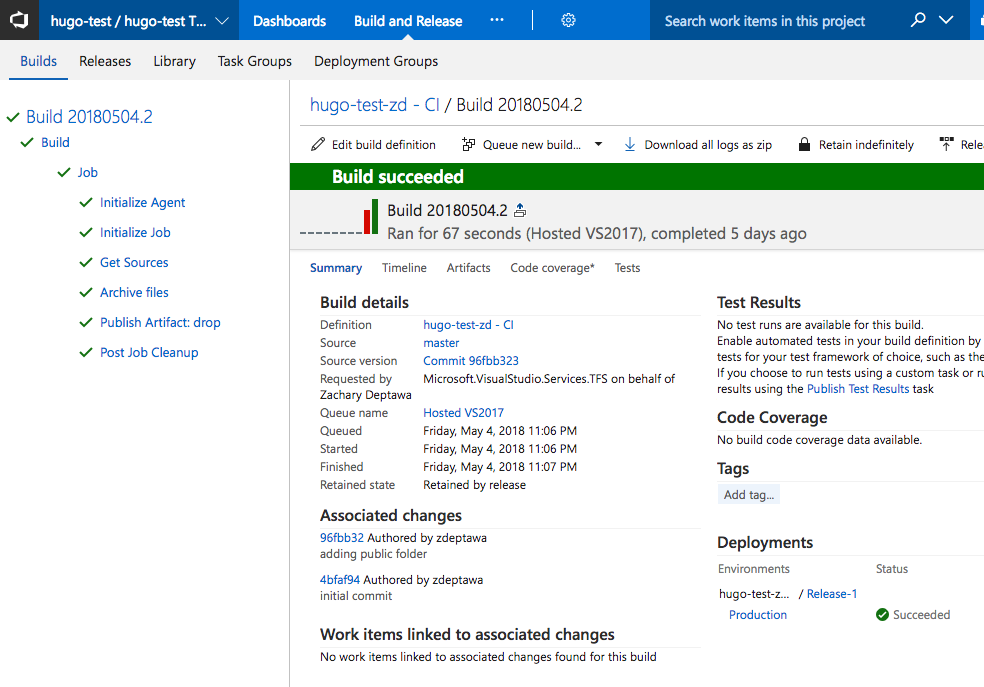
SUCCESS! We were right on the money with the missing public folder being our only problem in regard to the build failing. As you can see on the lower right-hand side of the build details screen above, a Release-1 of our project to Production was successful! How can we take a look at what we deployed?
Success!
Step 10: Let’s head over to our newly deployed blog!
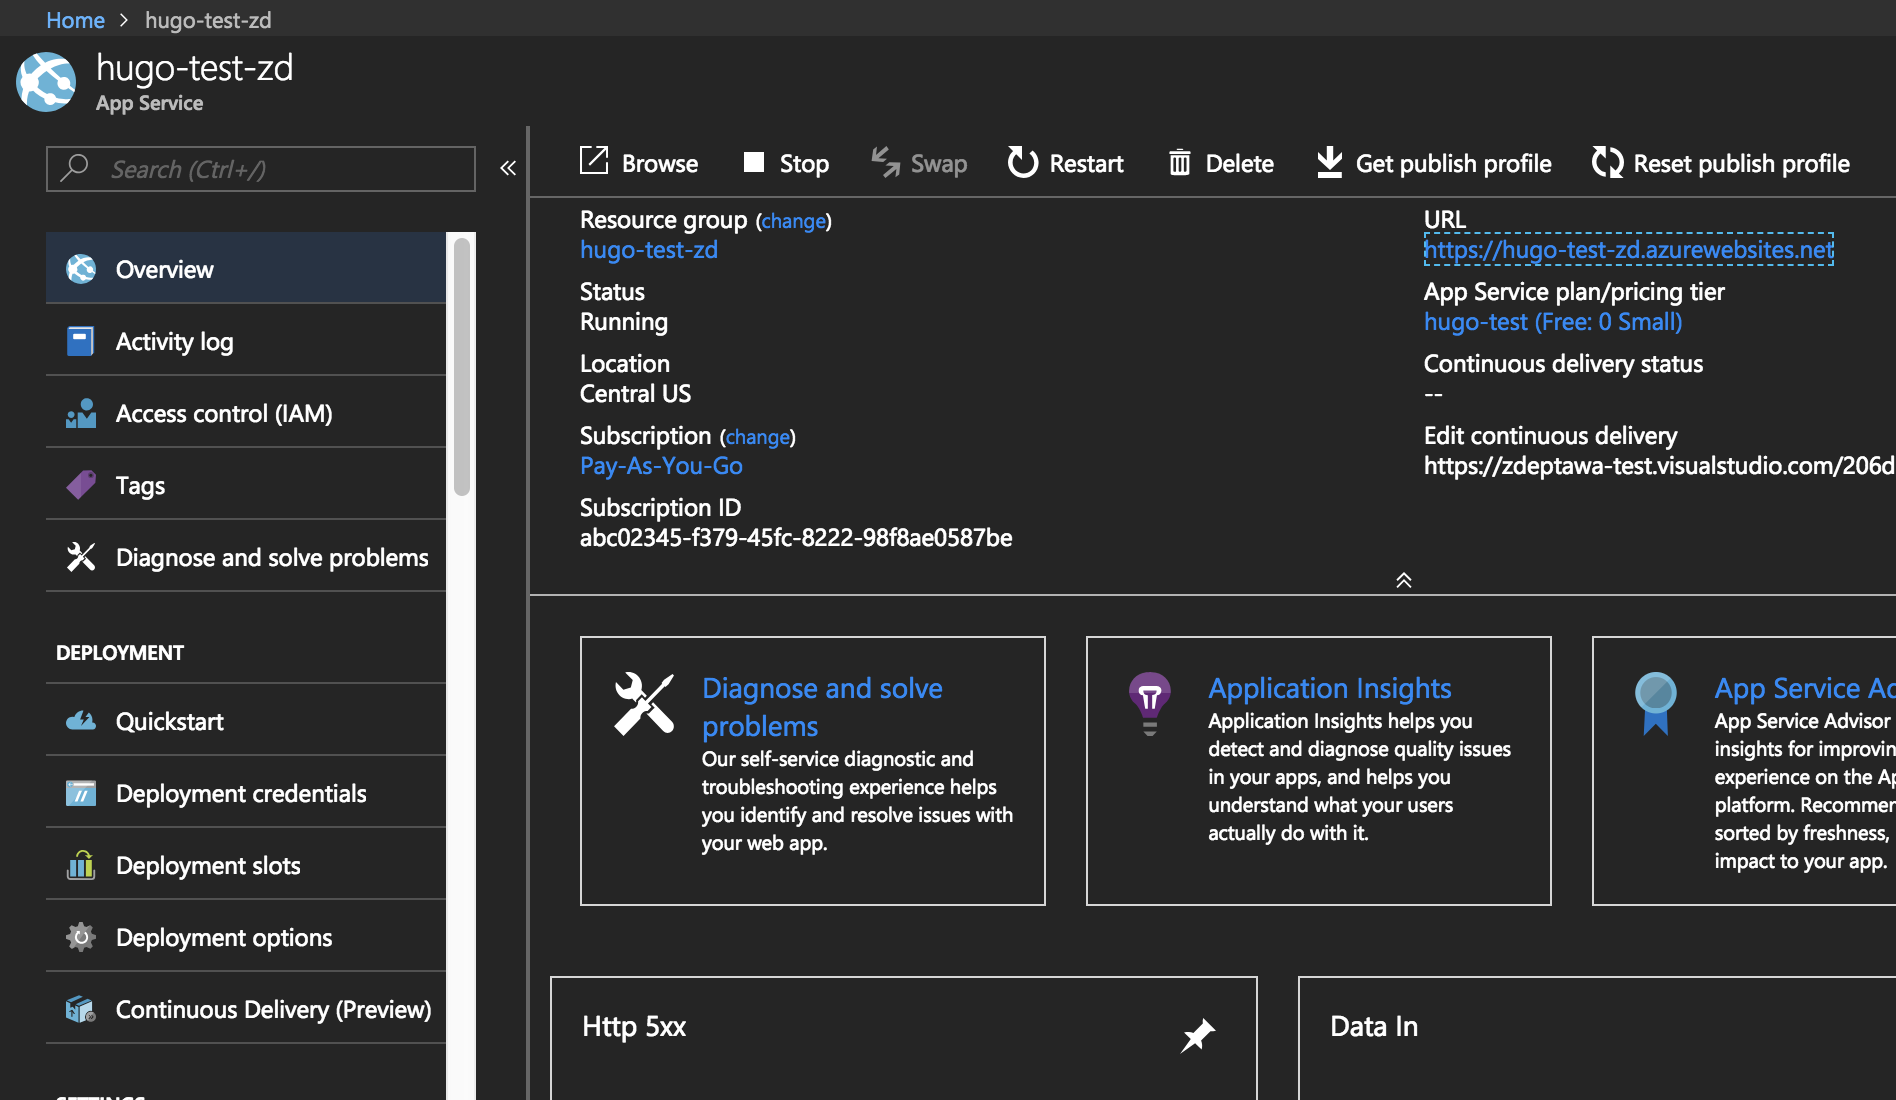
If you recall, we had to set a Web App name when we first set up this site inside of App Services. When we set that name, a subdomain to the azurewebsites.net URL was created for us based on that name. My App name was set to hugo-test-zd, so the URL that was created for my site within App Services is https://hugo-test-zd.azurewebsites.net. You can also find this URL on the main pane under your Web App in App Services toward the top right of the pane as seen below.
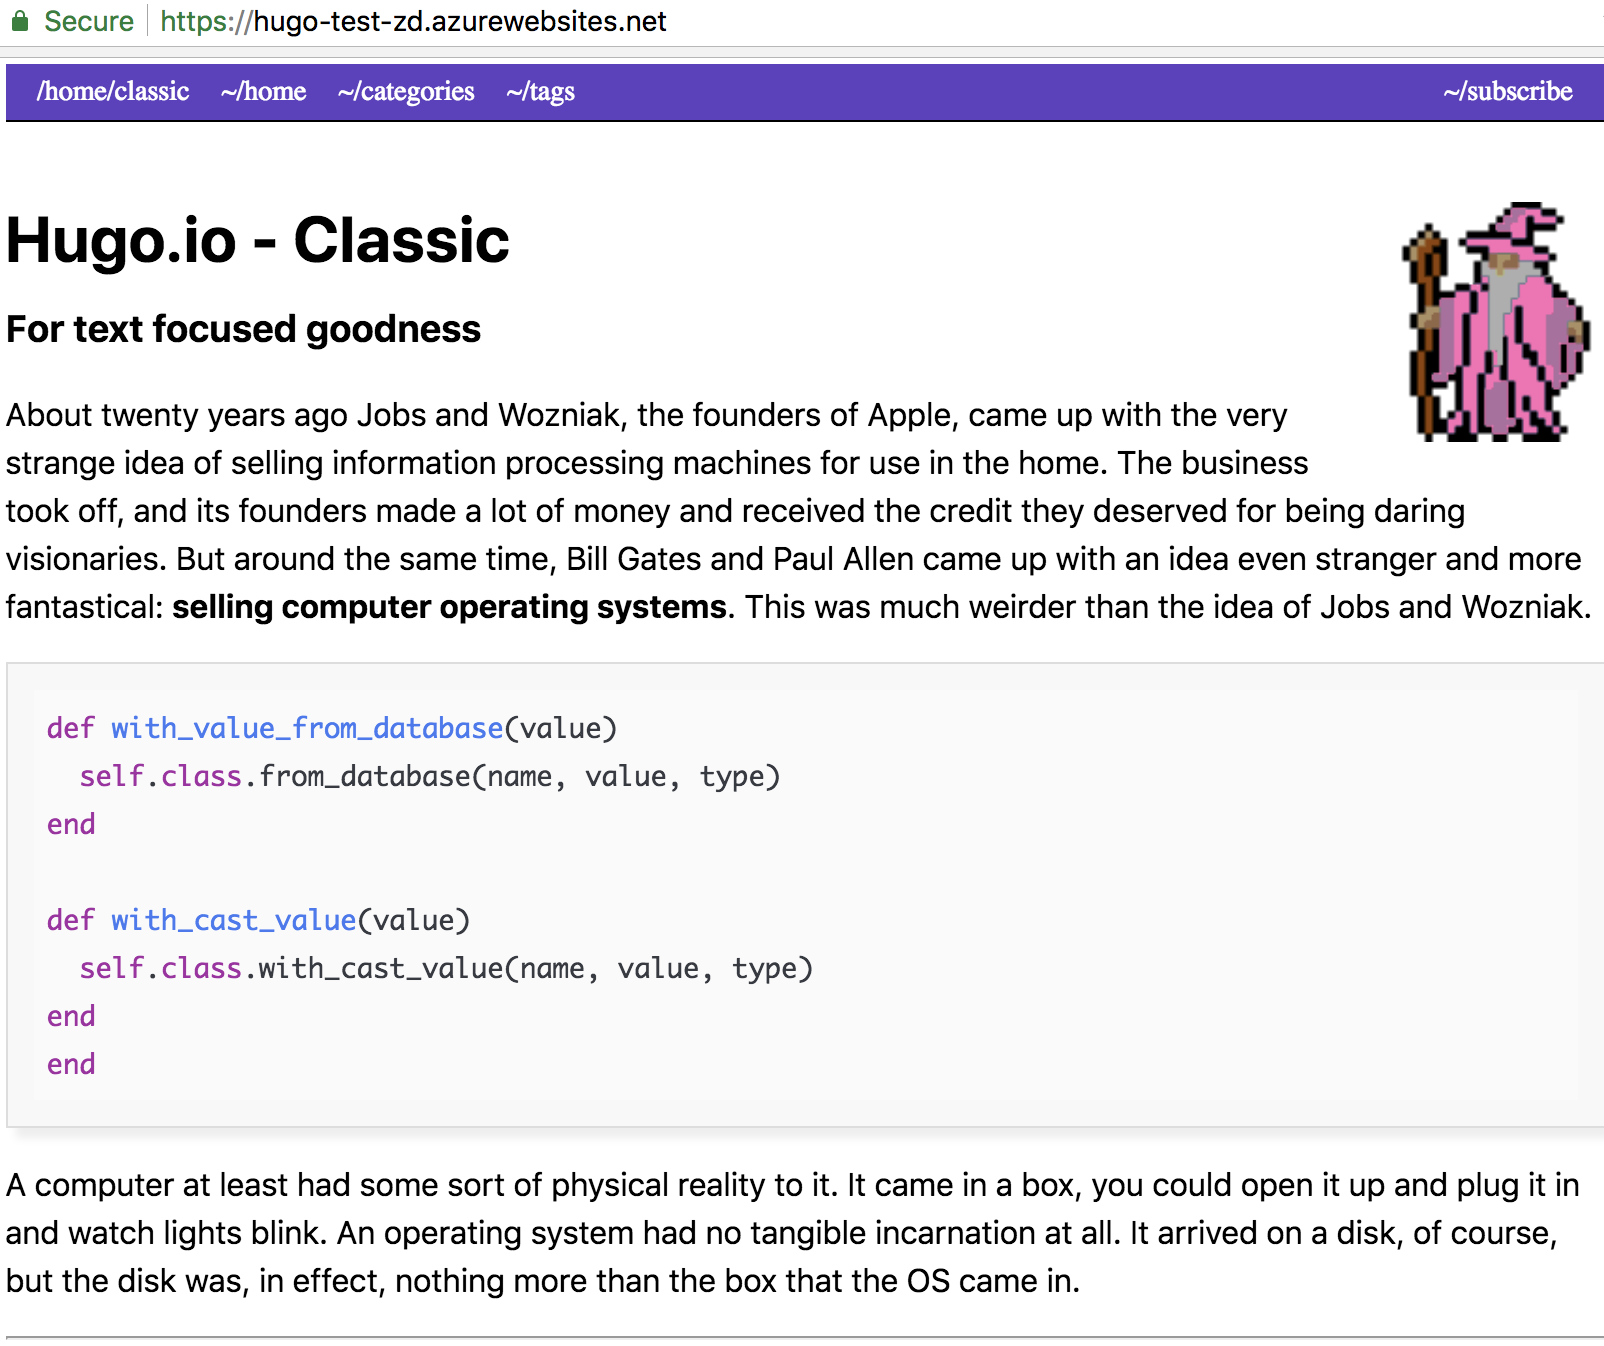
If I click on that URL or manually head over to https://hugo-test-zd.azurewebsites.net, I can see that my page loads and looks just like it did when I tested it locally.
That’s all there is to it. We just successfully deployed a Hugo blog to a free Azure App Services Web App using Visual Studio Team Services with Continuous Delivery! :D
Let’s recap.
You just did this. You made this happen. Be proud! :D
- Successfully set up and tested a local Hugo blog with a custom theme and demo data
- Created and configured an Azure App Services Web App
- Created and configured a Visual Studio Team Services project
- Set up version control for your blog via Git on VSTS
- Enabled automated deployments via Continuous Delivery via VSTS to App Services on Azure
- Made it through this entire tutorial!
This tutorial started out very barebones and grew to be quite a monster. I know some of you may be thinking, “why would you deploy a statically generated website like Hugo to an Azure App Services Web App? Couldn’t you just deploy it somewhere else like Azure Blob Storage?” Yes! You can absolutely deploy Hugo to many other services via countless other solutions. This tutorial was written to highlight a solution for someone just getting started that met the following criteria:
1. Running Hugo
2. Using **free** Azure services
3. Using git for version control
4. Automated deployment via version control
5. Graphical user interface experience for Azure and VSTS for new users
6. Zero cost for hosting or domain name (shared domain name is fine)
We were able to handle these requirements. This solution also allowed me to touch base on things like the git workflow, some basic troubleshooting steps for failed builds in VSTS, setting up App Service Plans in Azure, etc.
What now?
First off, if you made it through this entire tutorial, THANK YOU! I truly hope you were able to learn something new or interesting. My first recommendation for what to do next… keep playing with and learning new services and technology!
I will be augmenting this deployment with new tutorials to cover things like using a custom domain, implementing SSL, implementing CDN support, Azure CLI, etc. For now, I’d highly recommend checking out some of Azure’s other 25+ FREE services!!!
If you have any questions or would like to chat, please shoot me a message @zdeptawa on Twitter. Have a great week!
